Wedding Work: Florals from Floor to Ceiling inspired by the Blue Ridge

One of our favorite weddings to date, hosted in Greenville, South Carolina for Ashton and Stephen. The bride, Ashton, knew the power of flower! The vision was to transform The Westfield event space into something that felt whimsical, but natural, with the blue and lavender color palette inspired by the Blue Ridge Mountains.

It took a team of 5 of us to pull it off and it went off without a hitch!

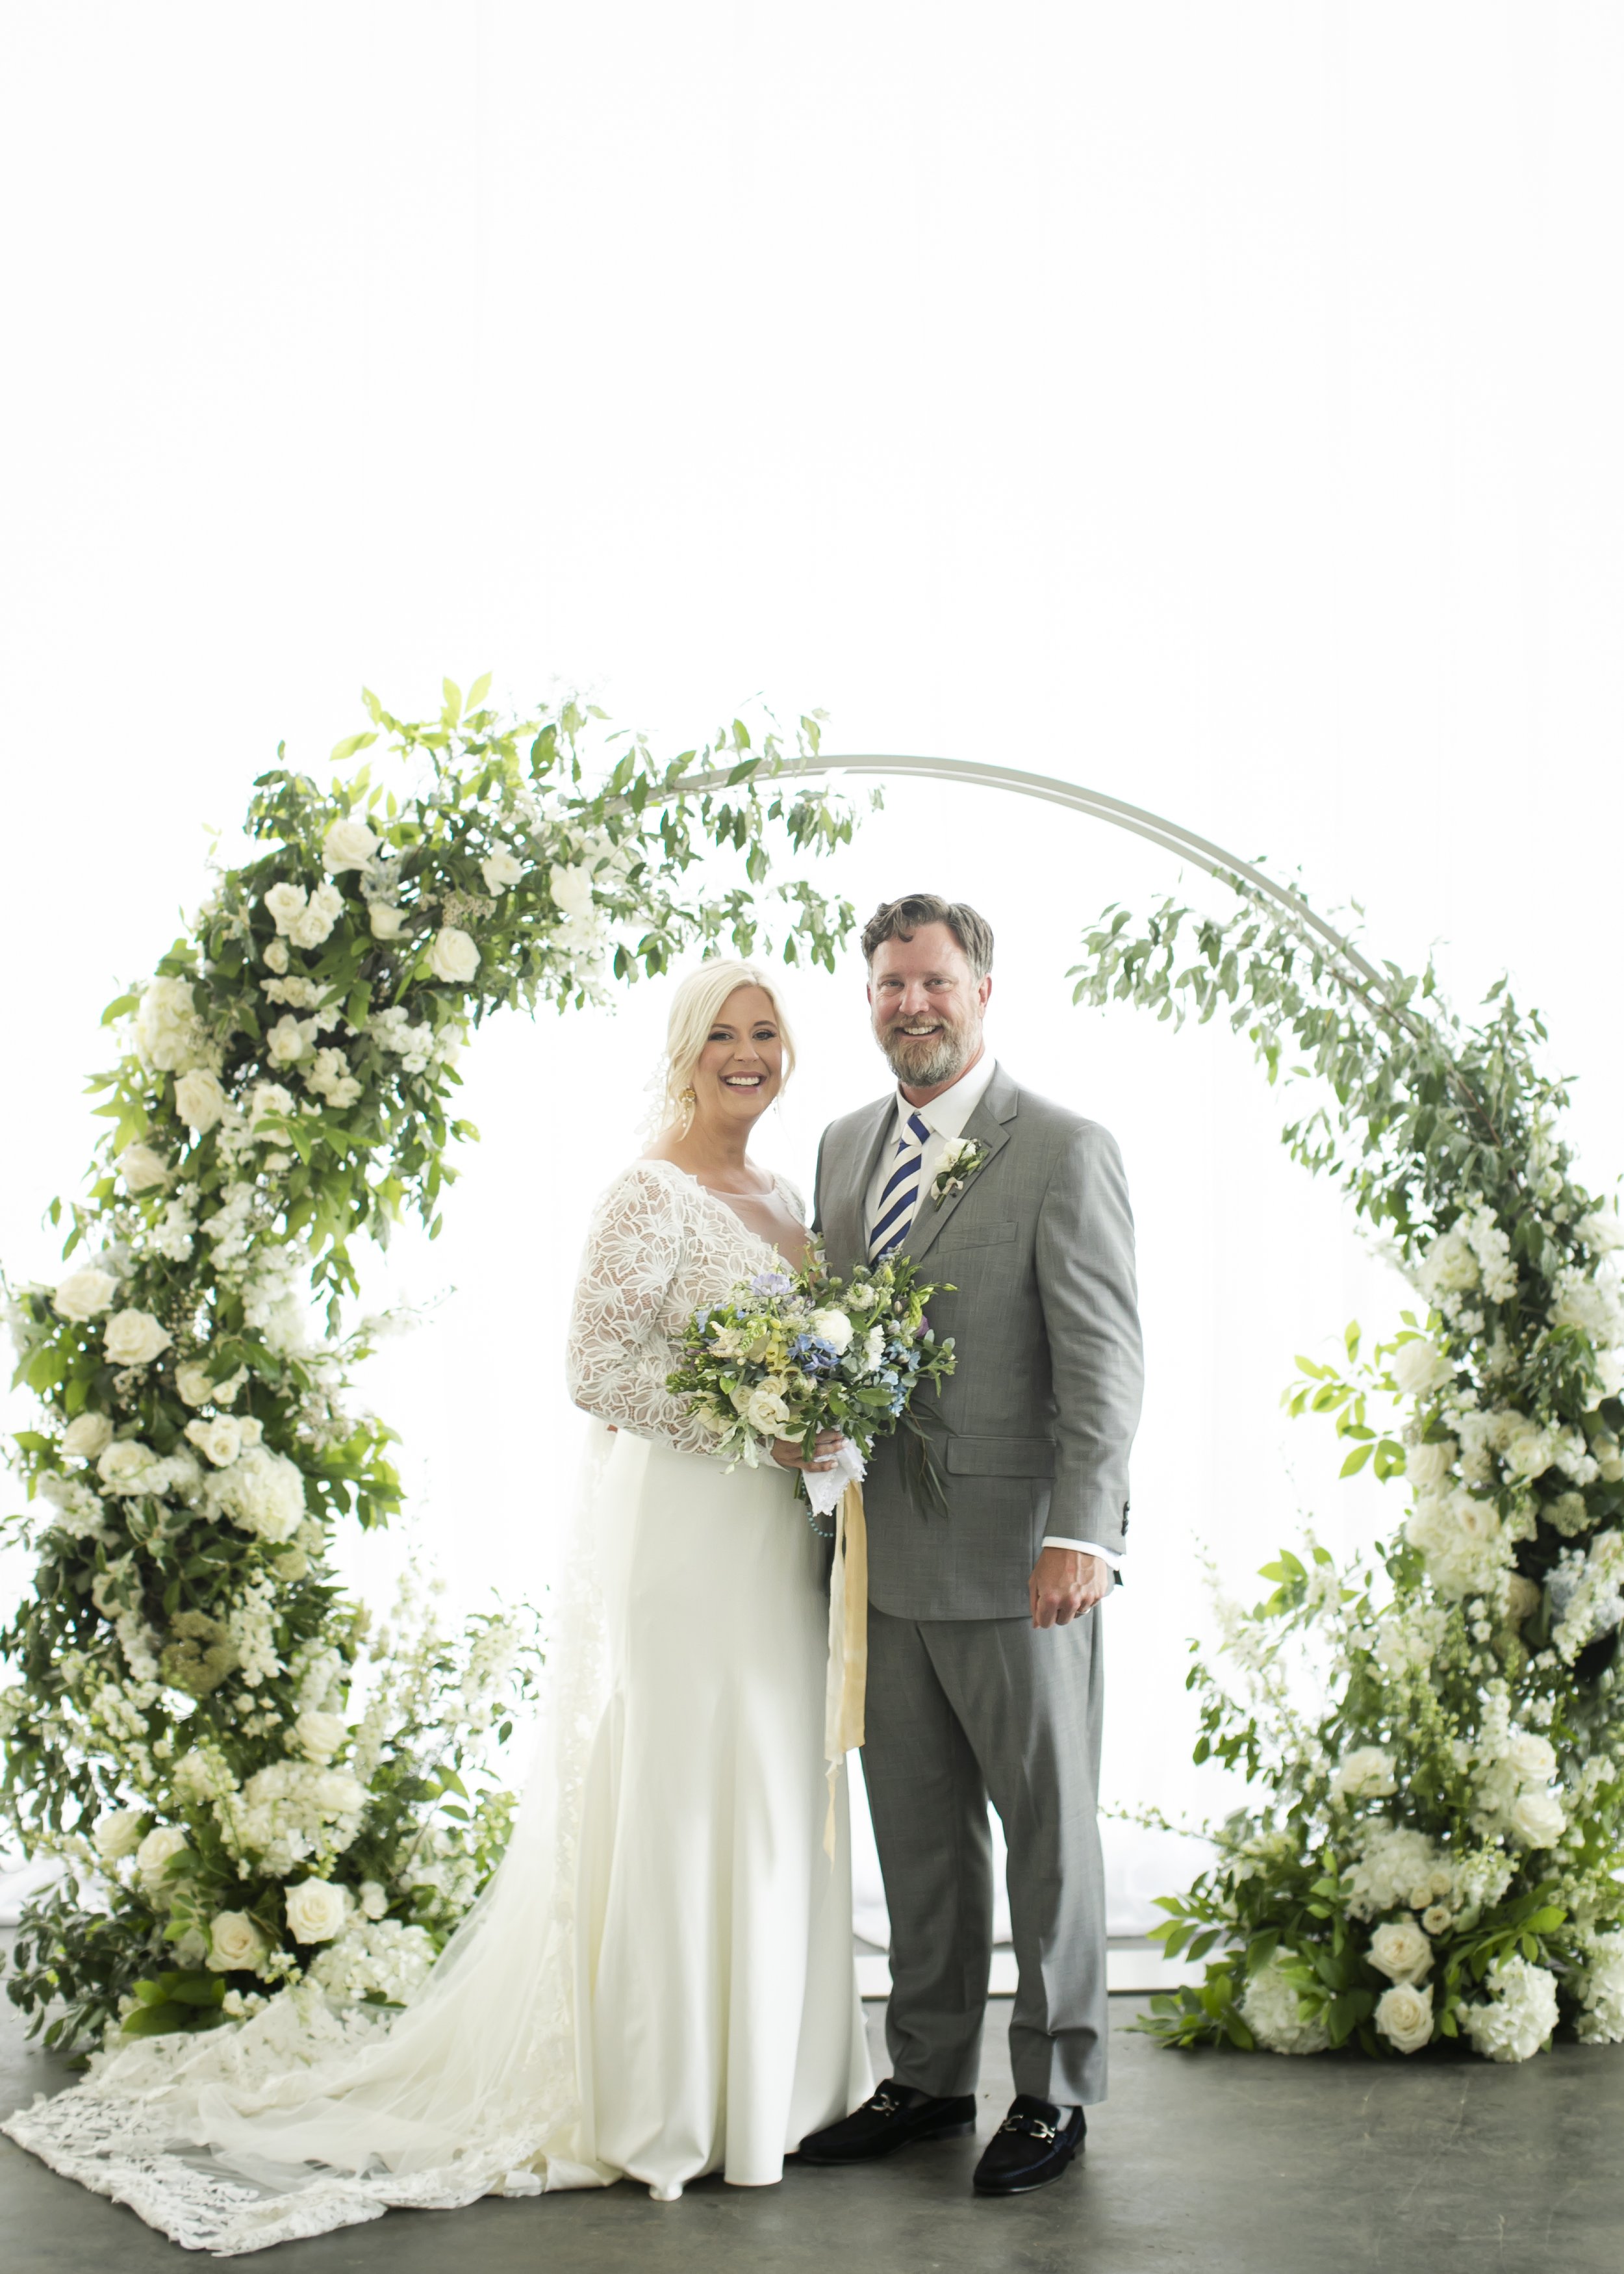
The arbor was created on a rounded frame. We saved the color for later in the evening, but maintained the whimsical vibe with bouncy branches to give it a wild and natural look. 

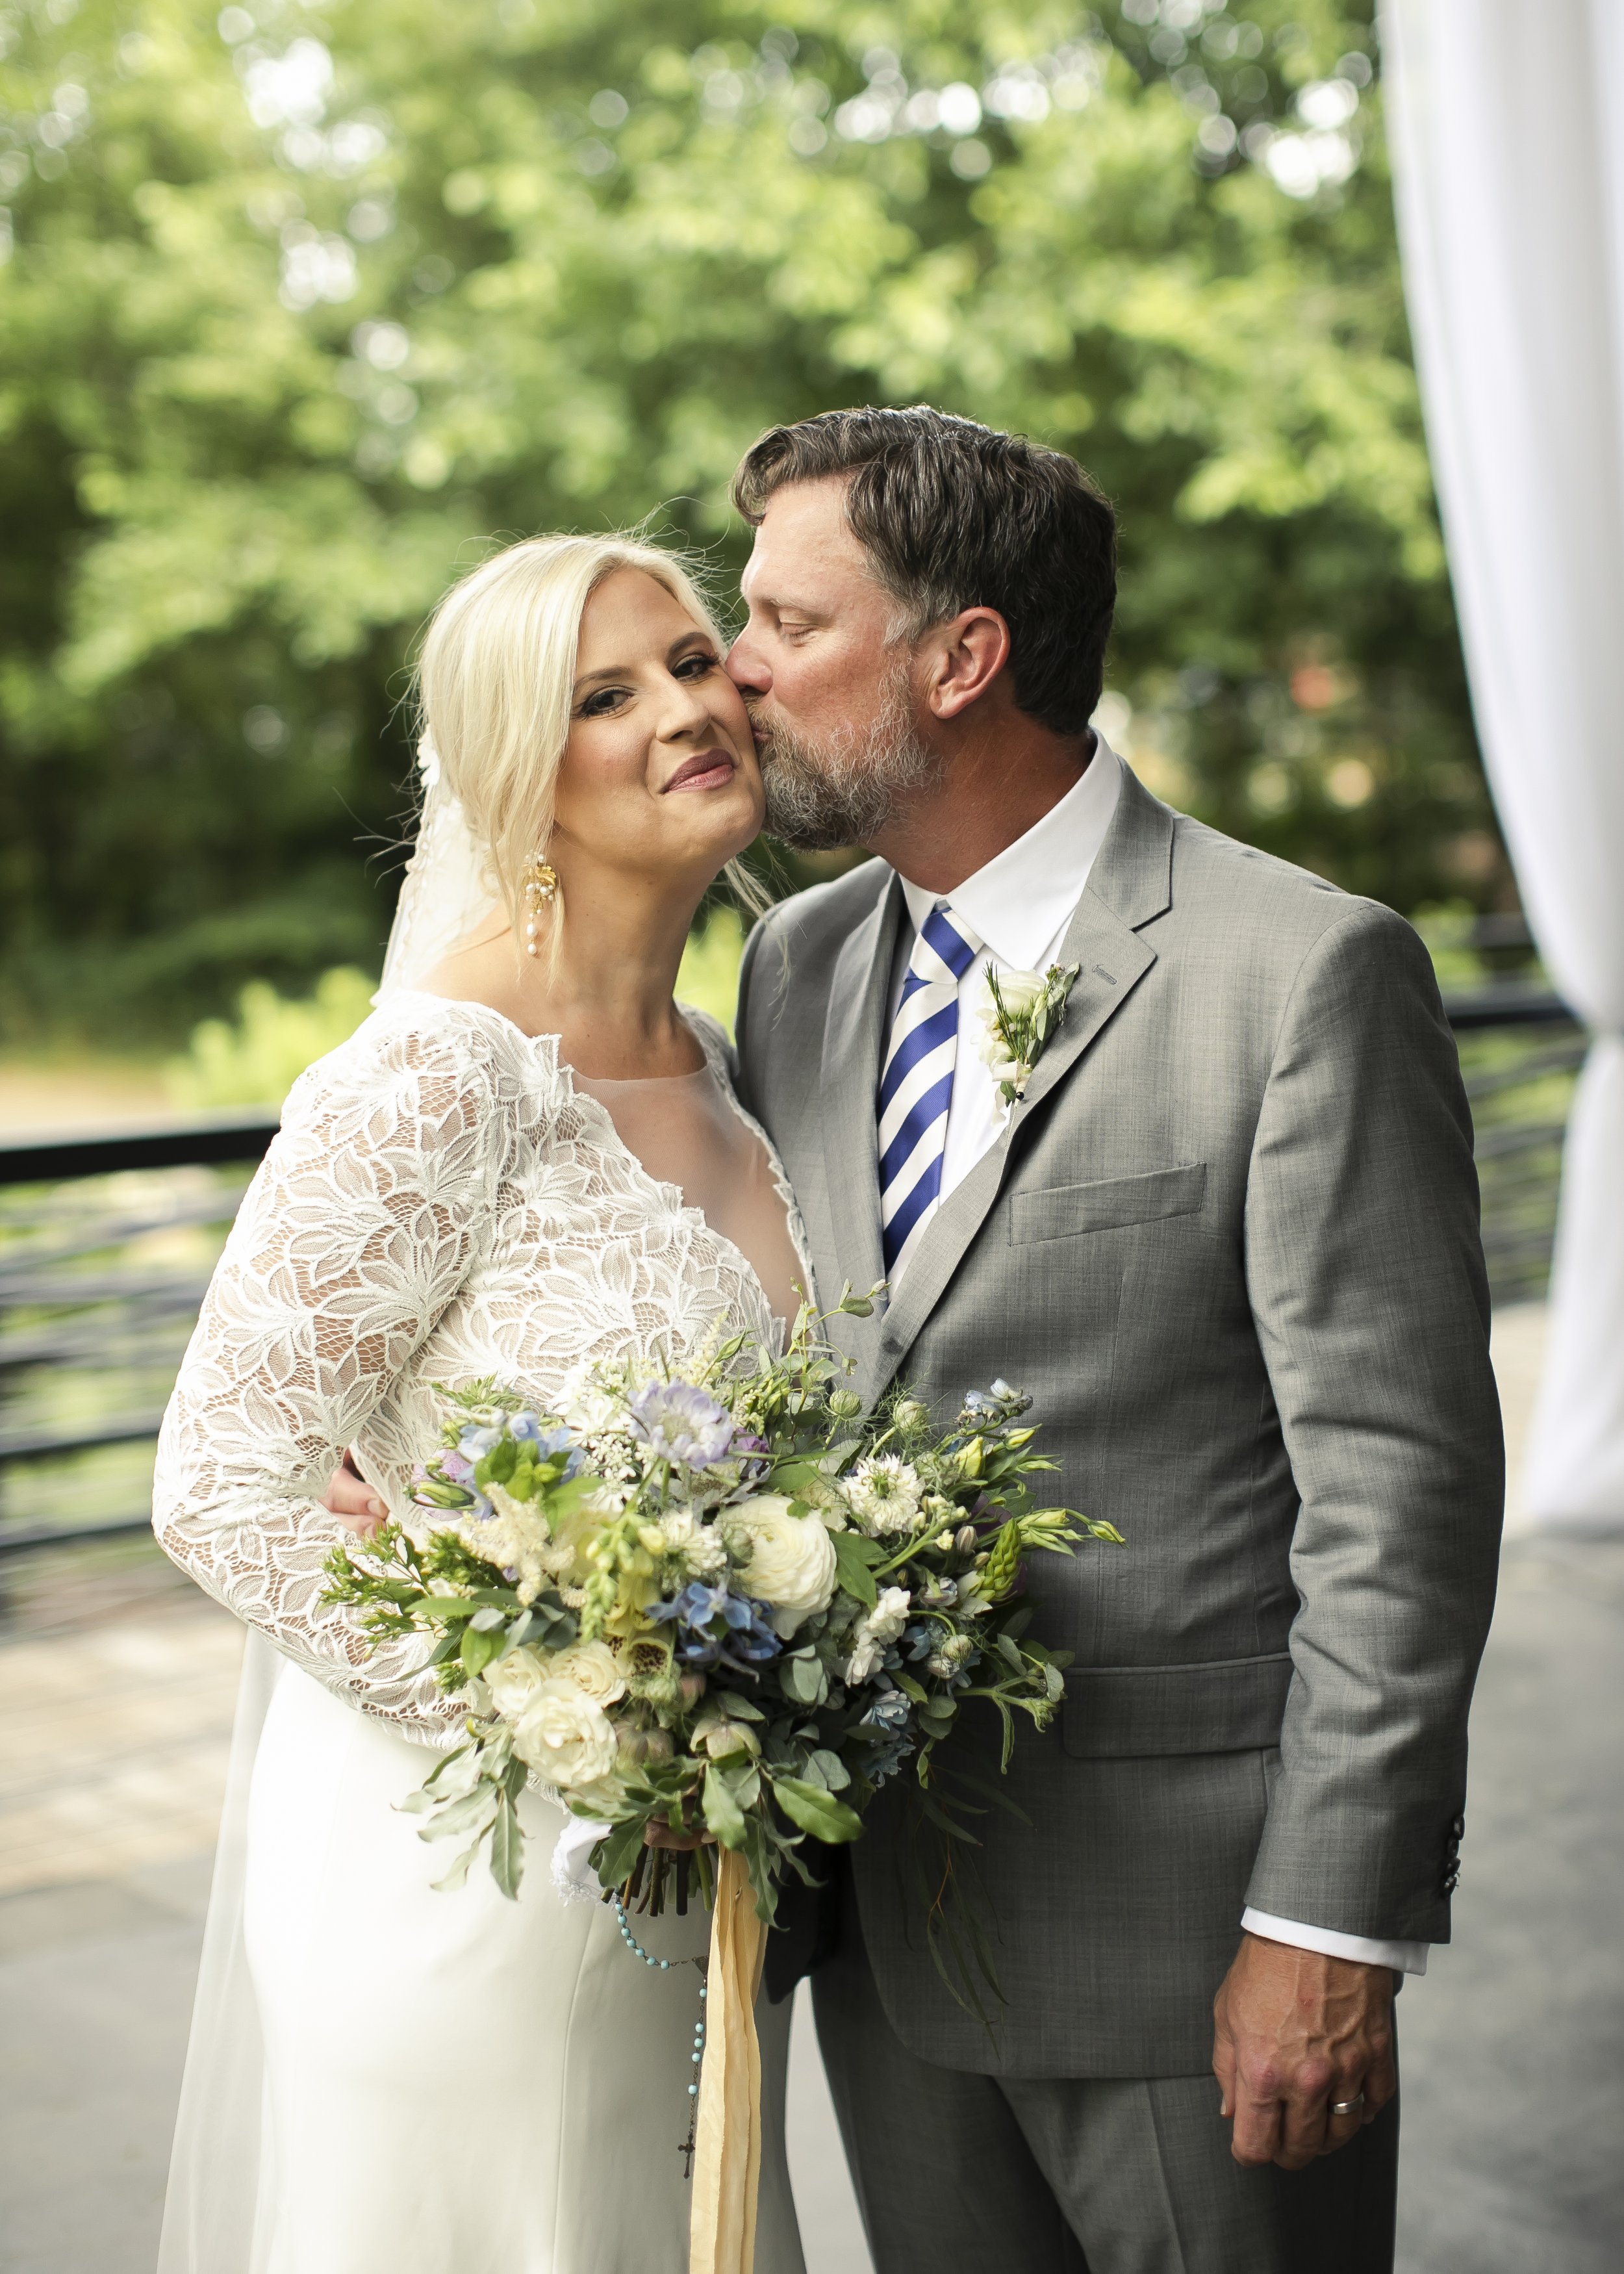
Her bouquet brought the color for a bit, bridging the gap between ceremony and reception. Largely whites and greens, with pops of purple, periwinkle, and blue.

Guests were welcomed into the reception space by a large focal arrangement incorporating color and movement.

Above the focal arrangement was a chandelier where we added loose greens around the circumference. Loose greens here and there can take a wedding from formal and traditional to whimsical and modern instantly! 

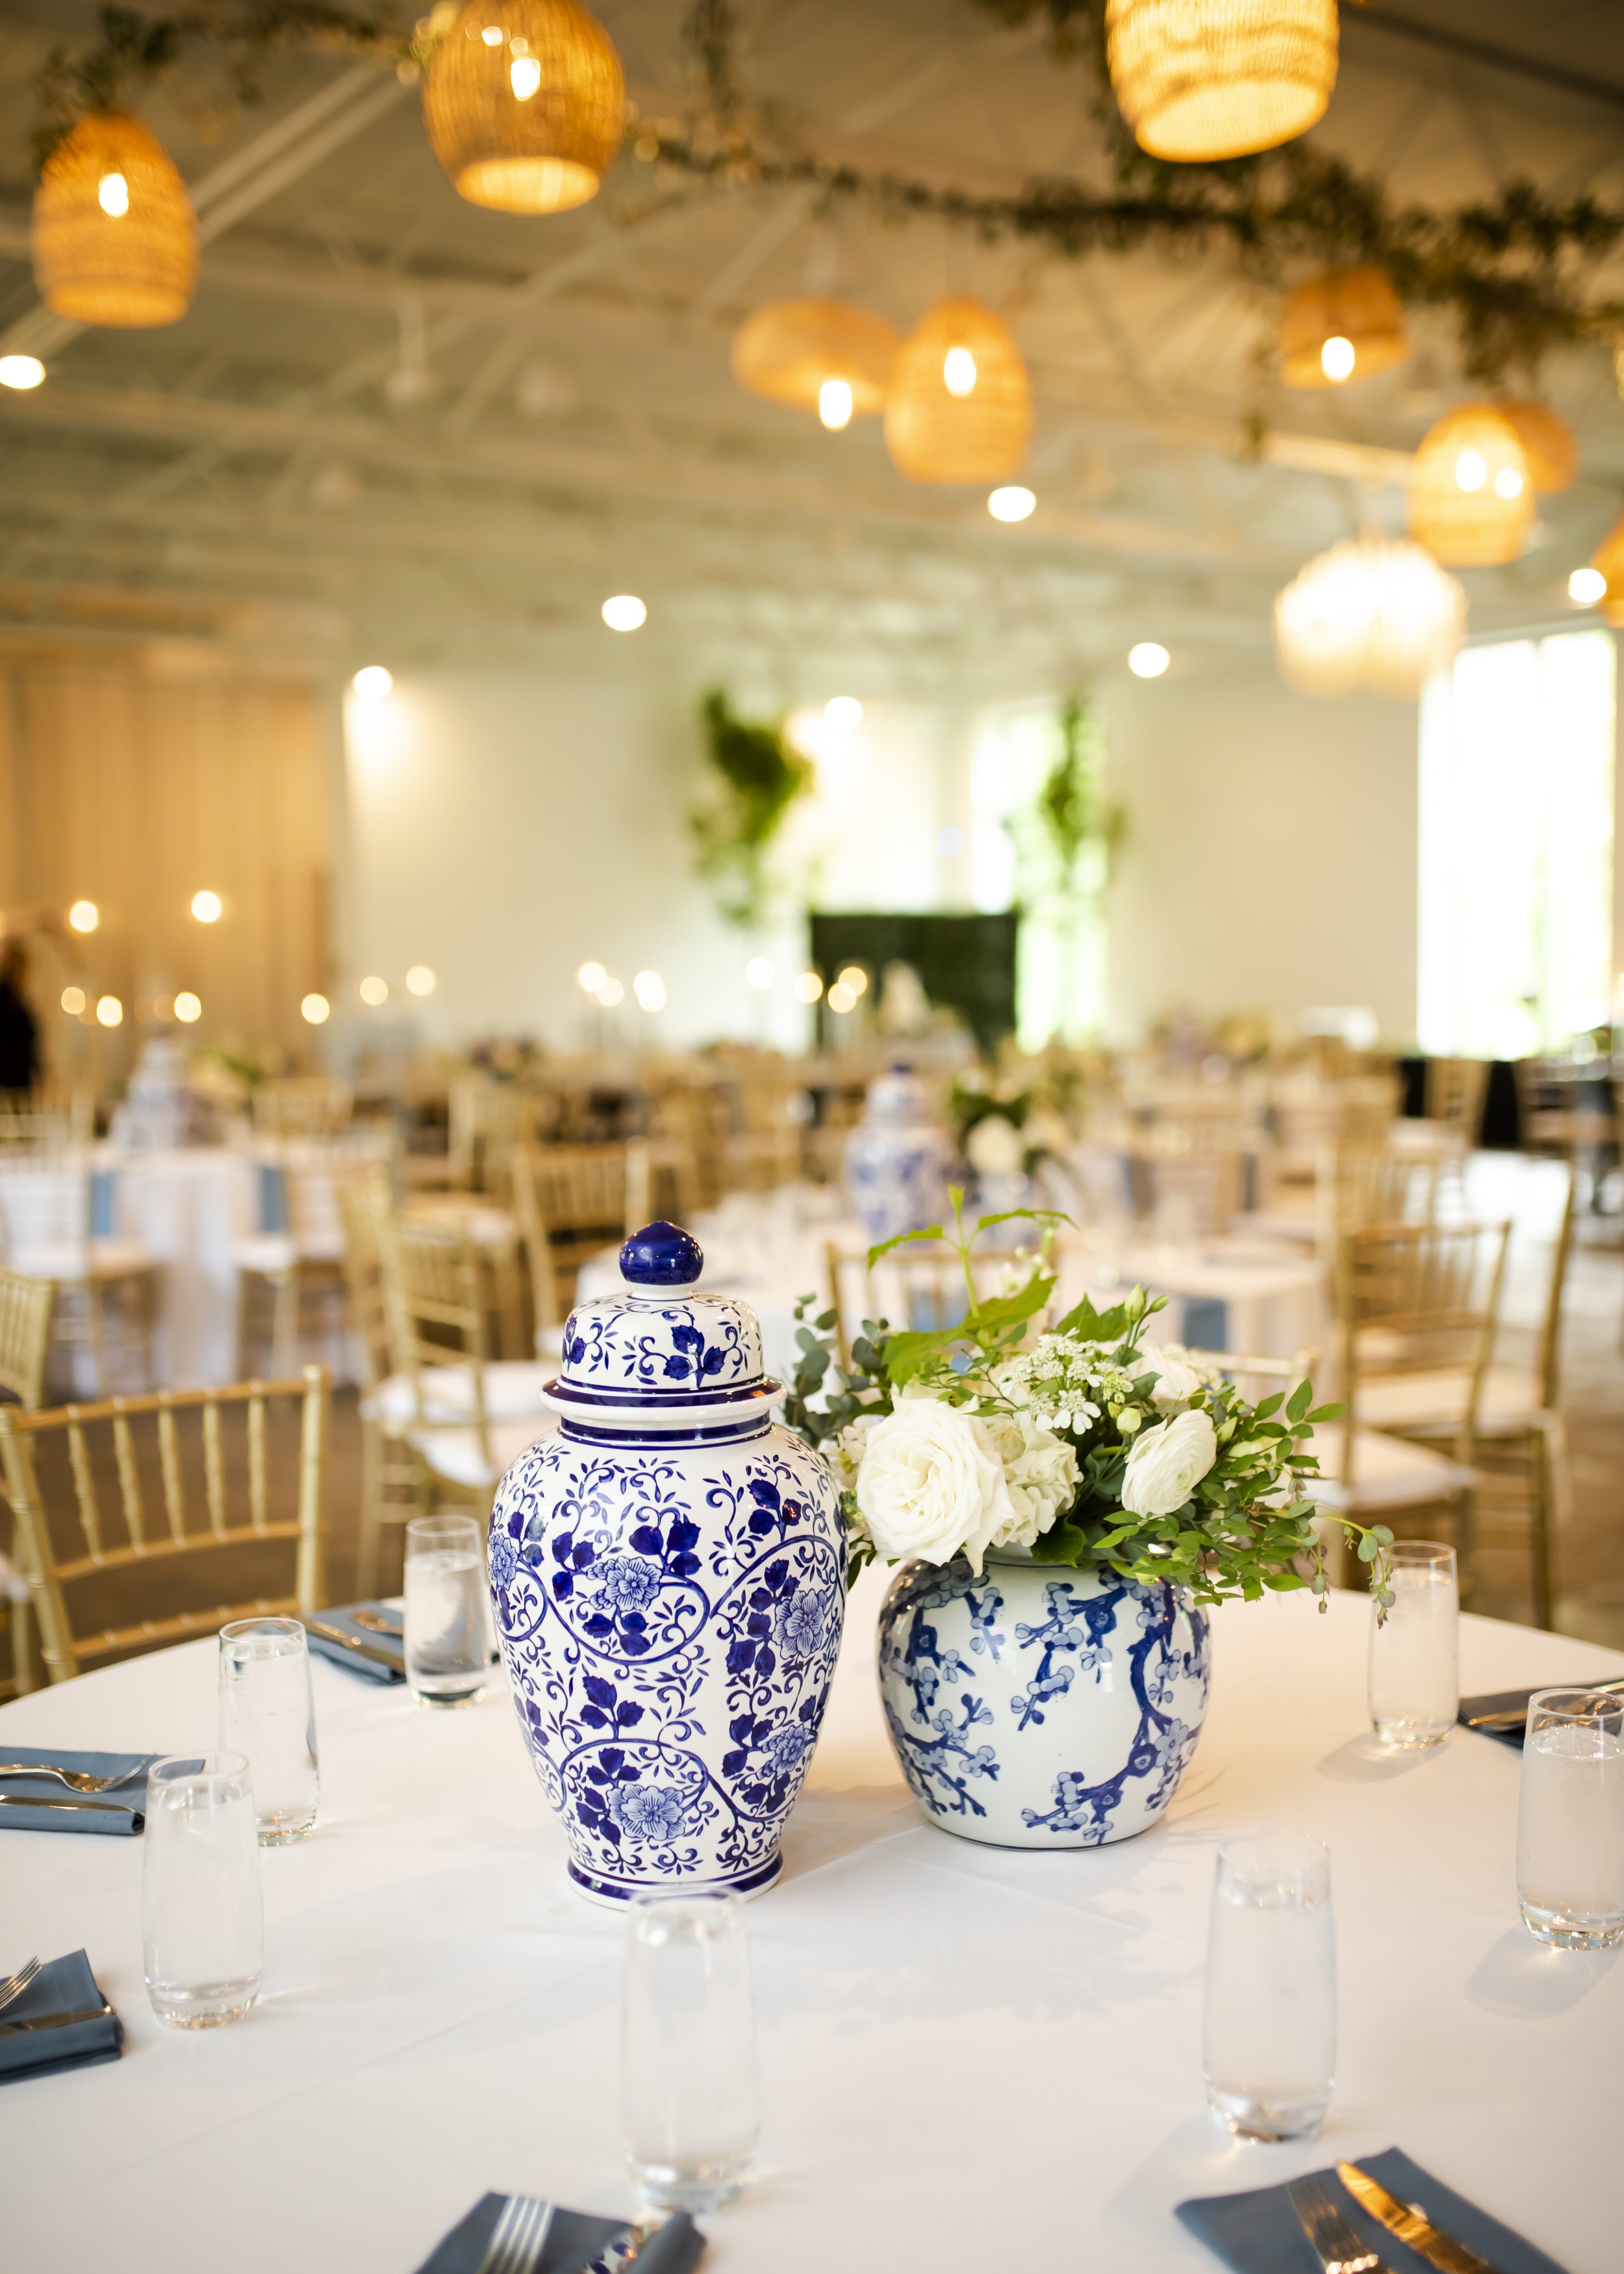
An arrangement similar in style and feel was created for the photo table. The blue and white chinoiserie inspired vases were brought in to incorporate more blue notes both here and mixed into the reception tables.

A unique part of the reception space was the lounge area. Beautiful furniture pieces fitting the color pallete and vibe were tied into the space with a simple white and green floral arrangement placed on either side of the couch

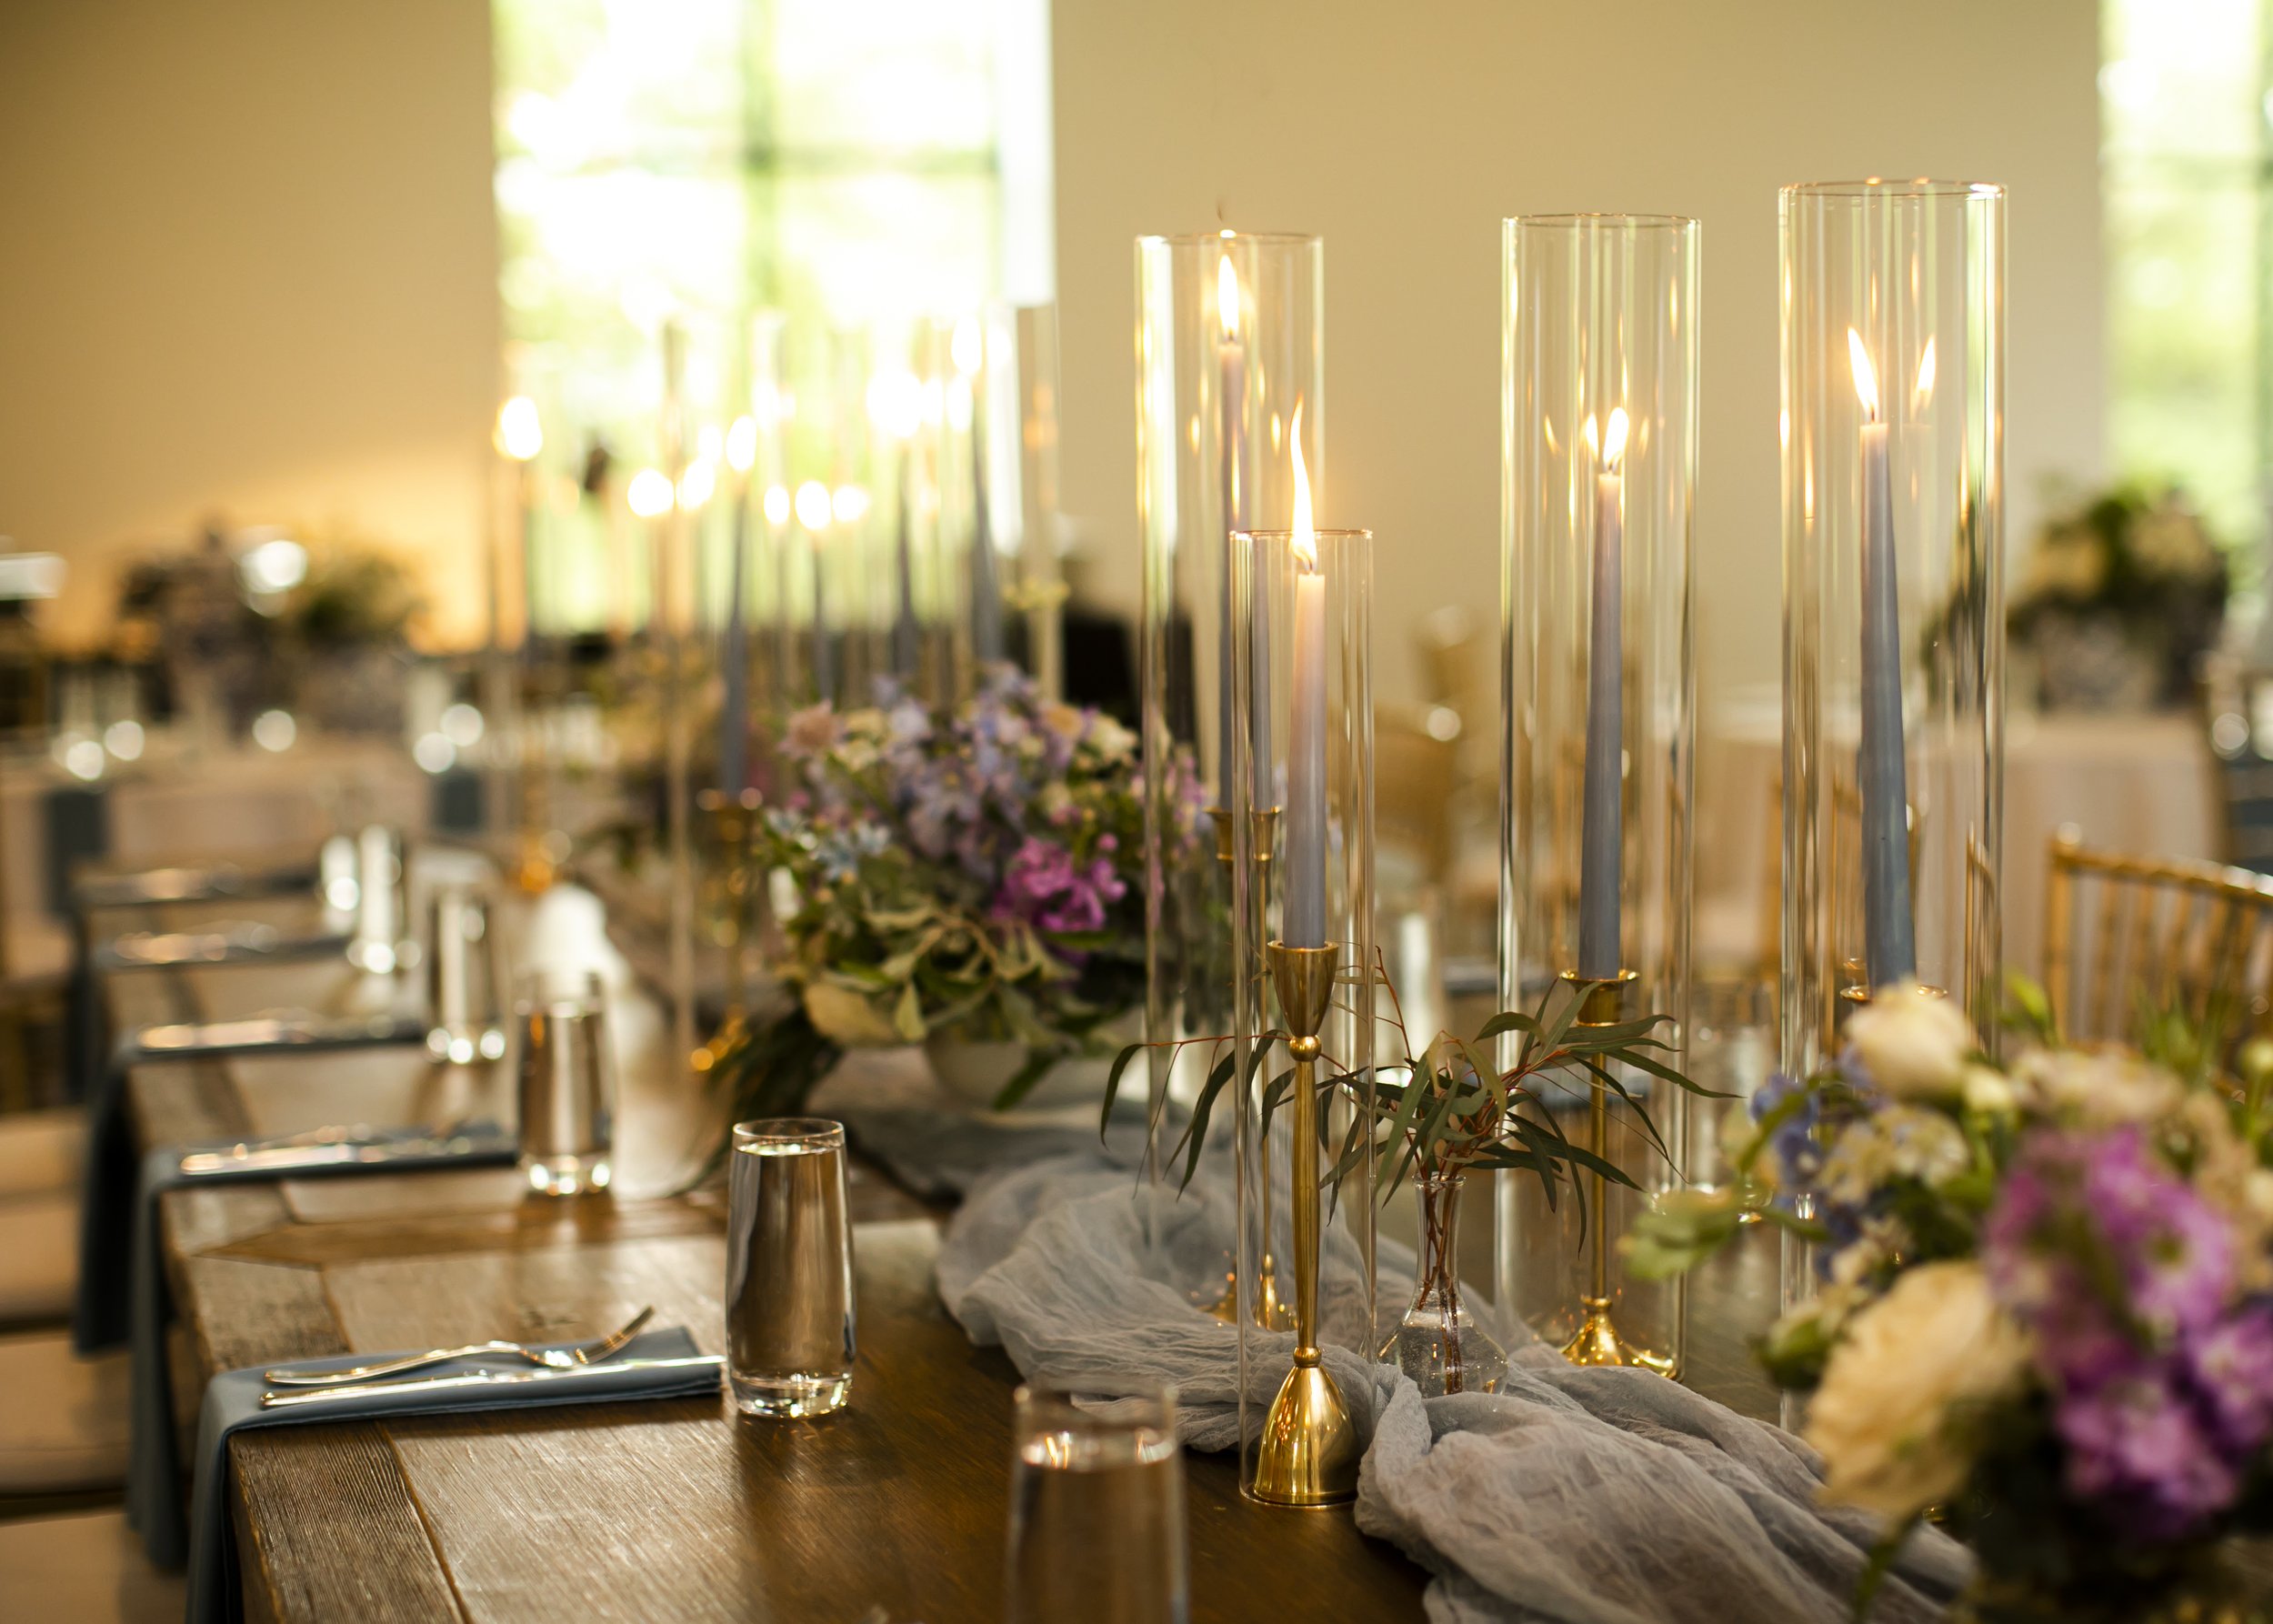
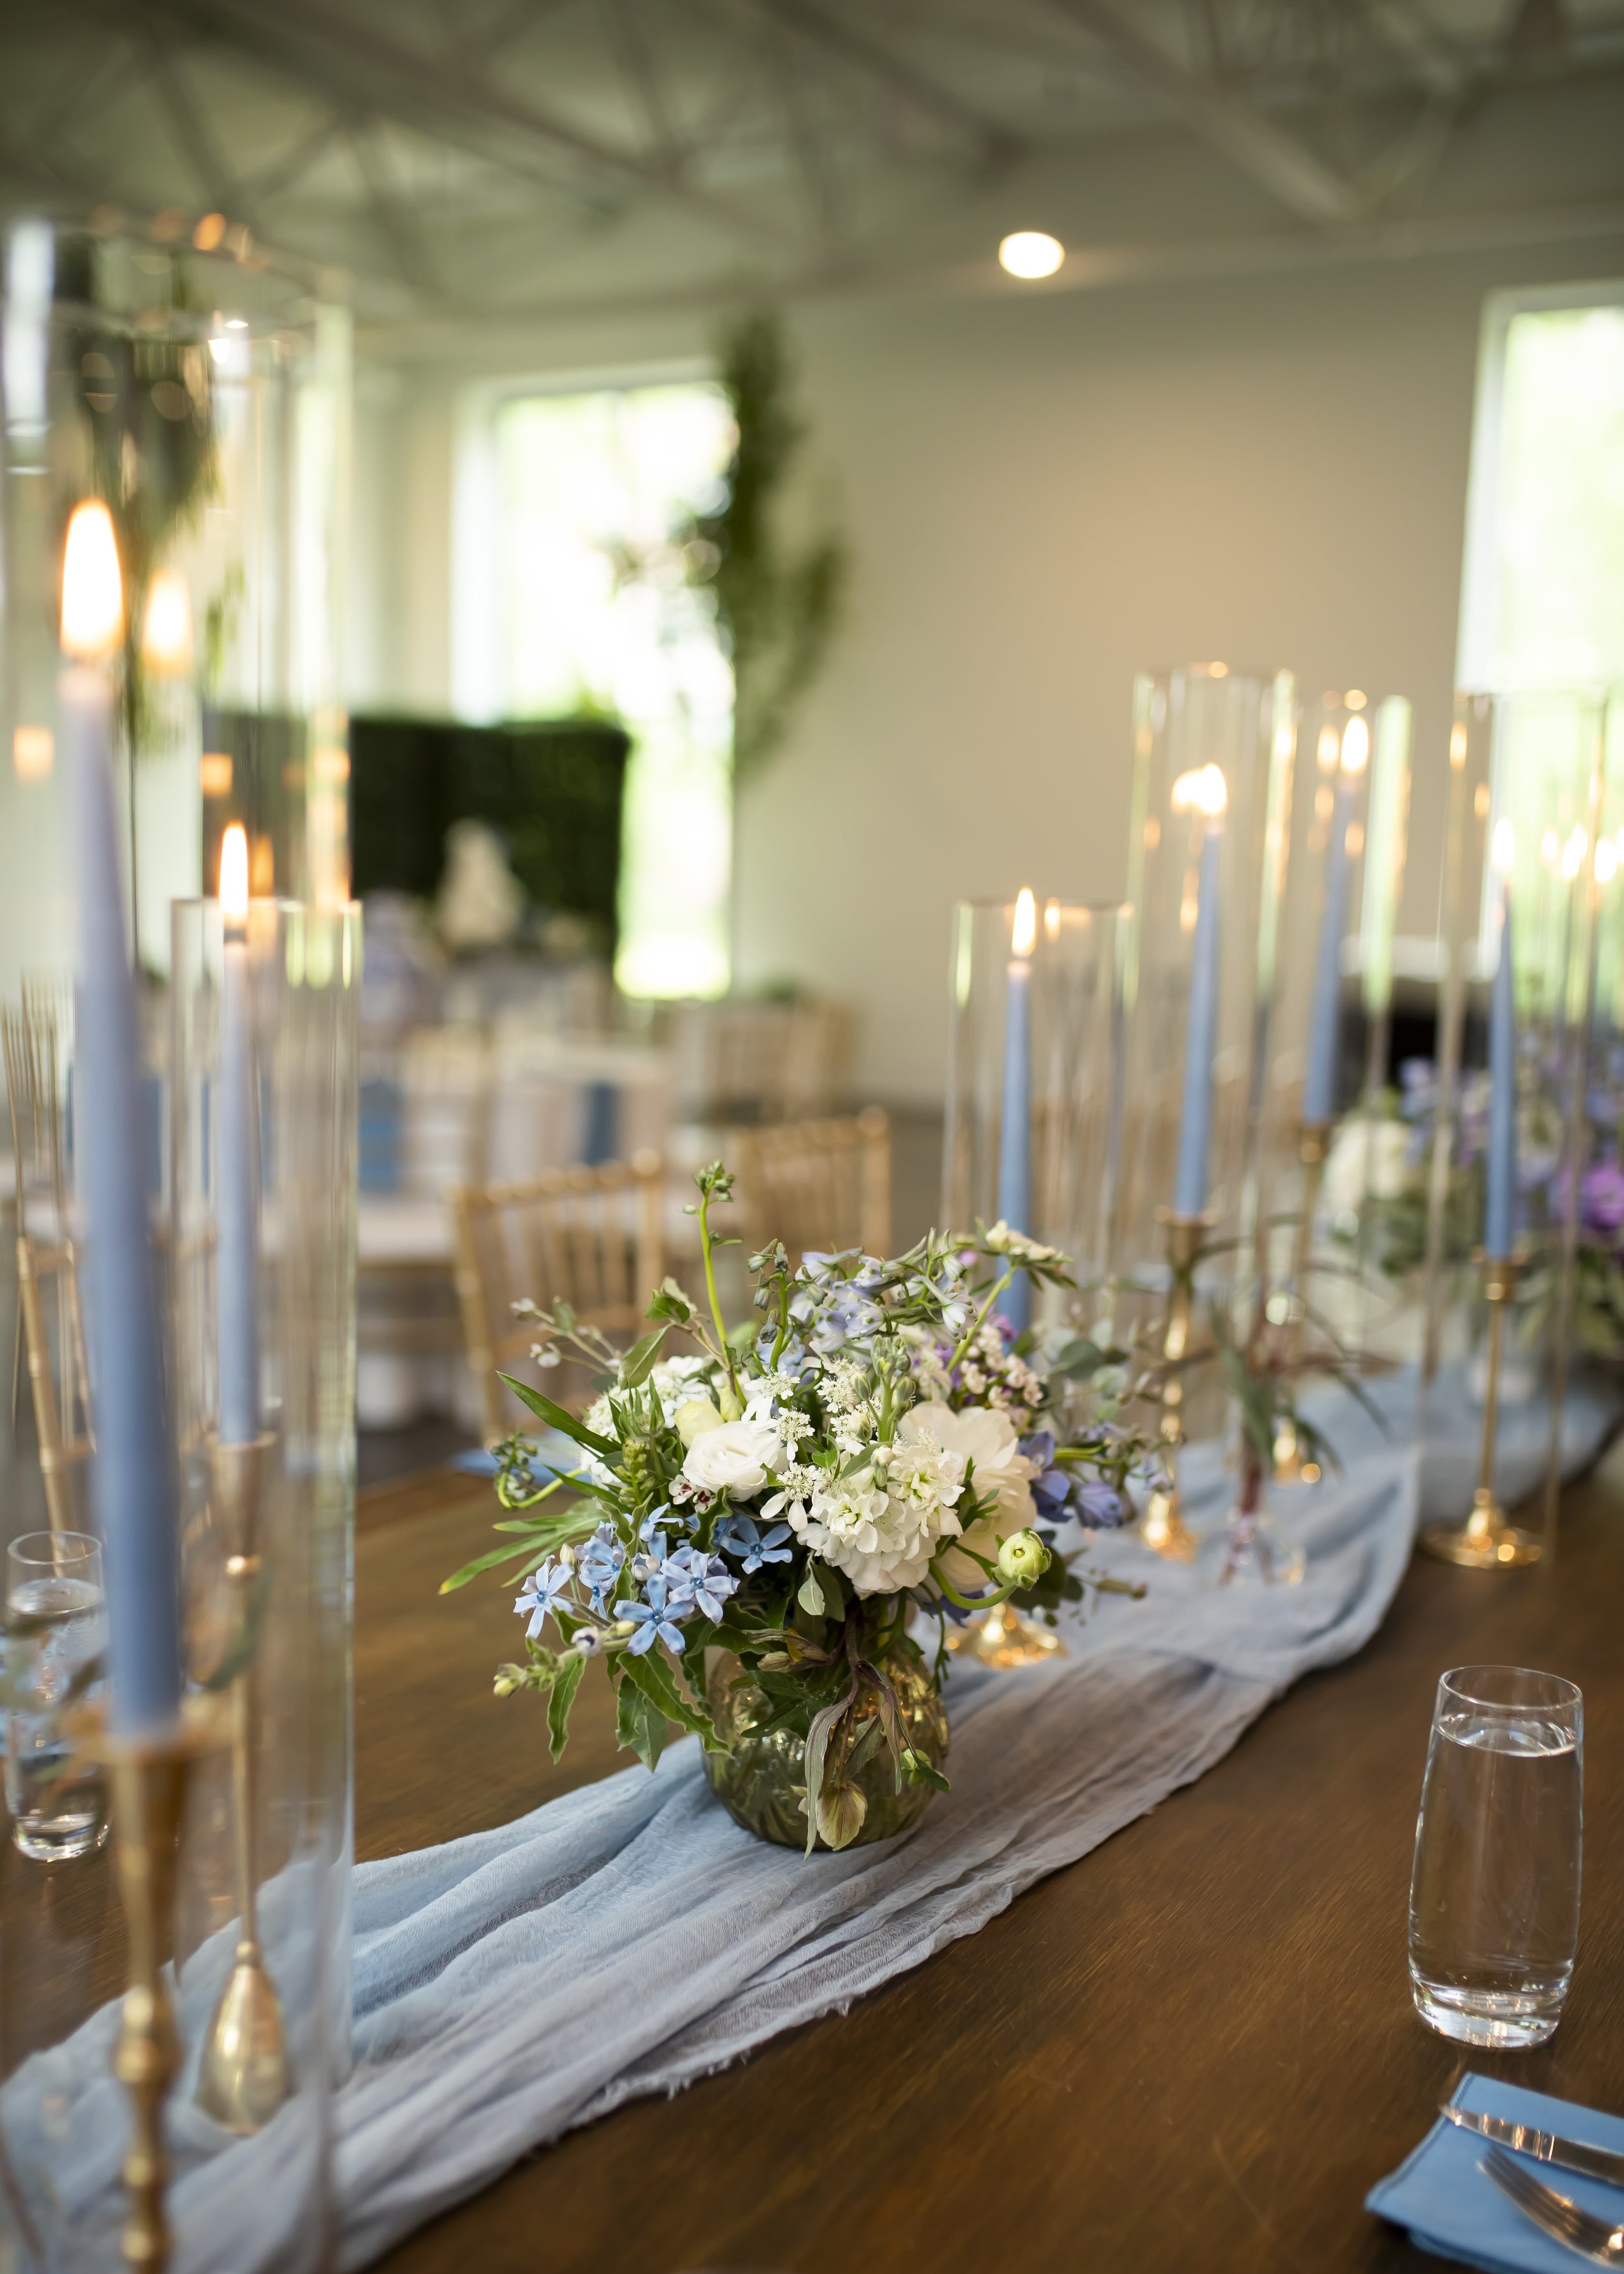
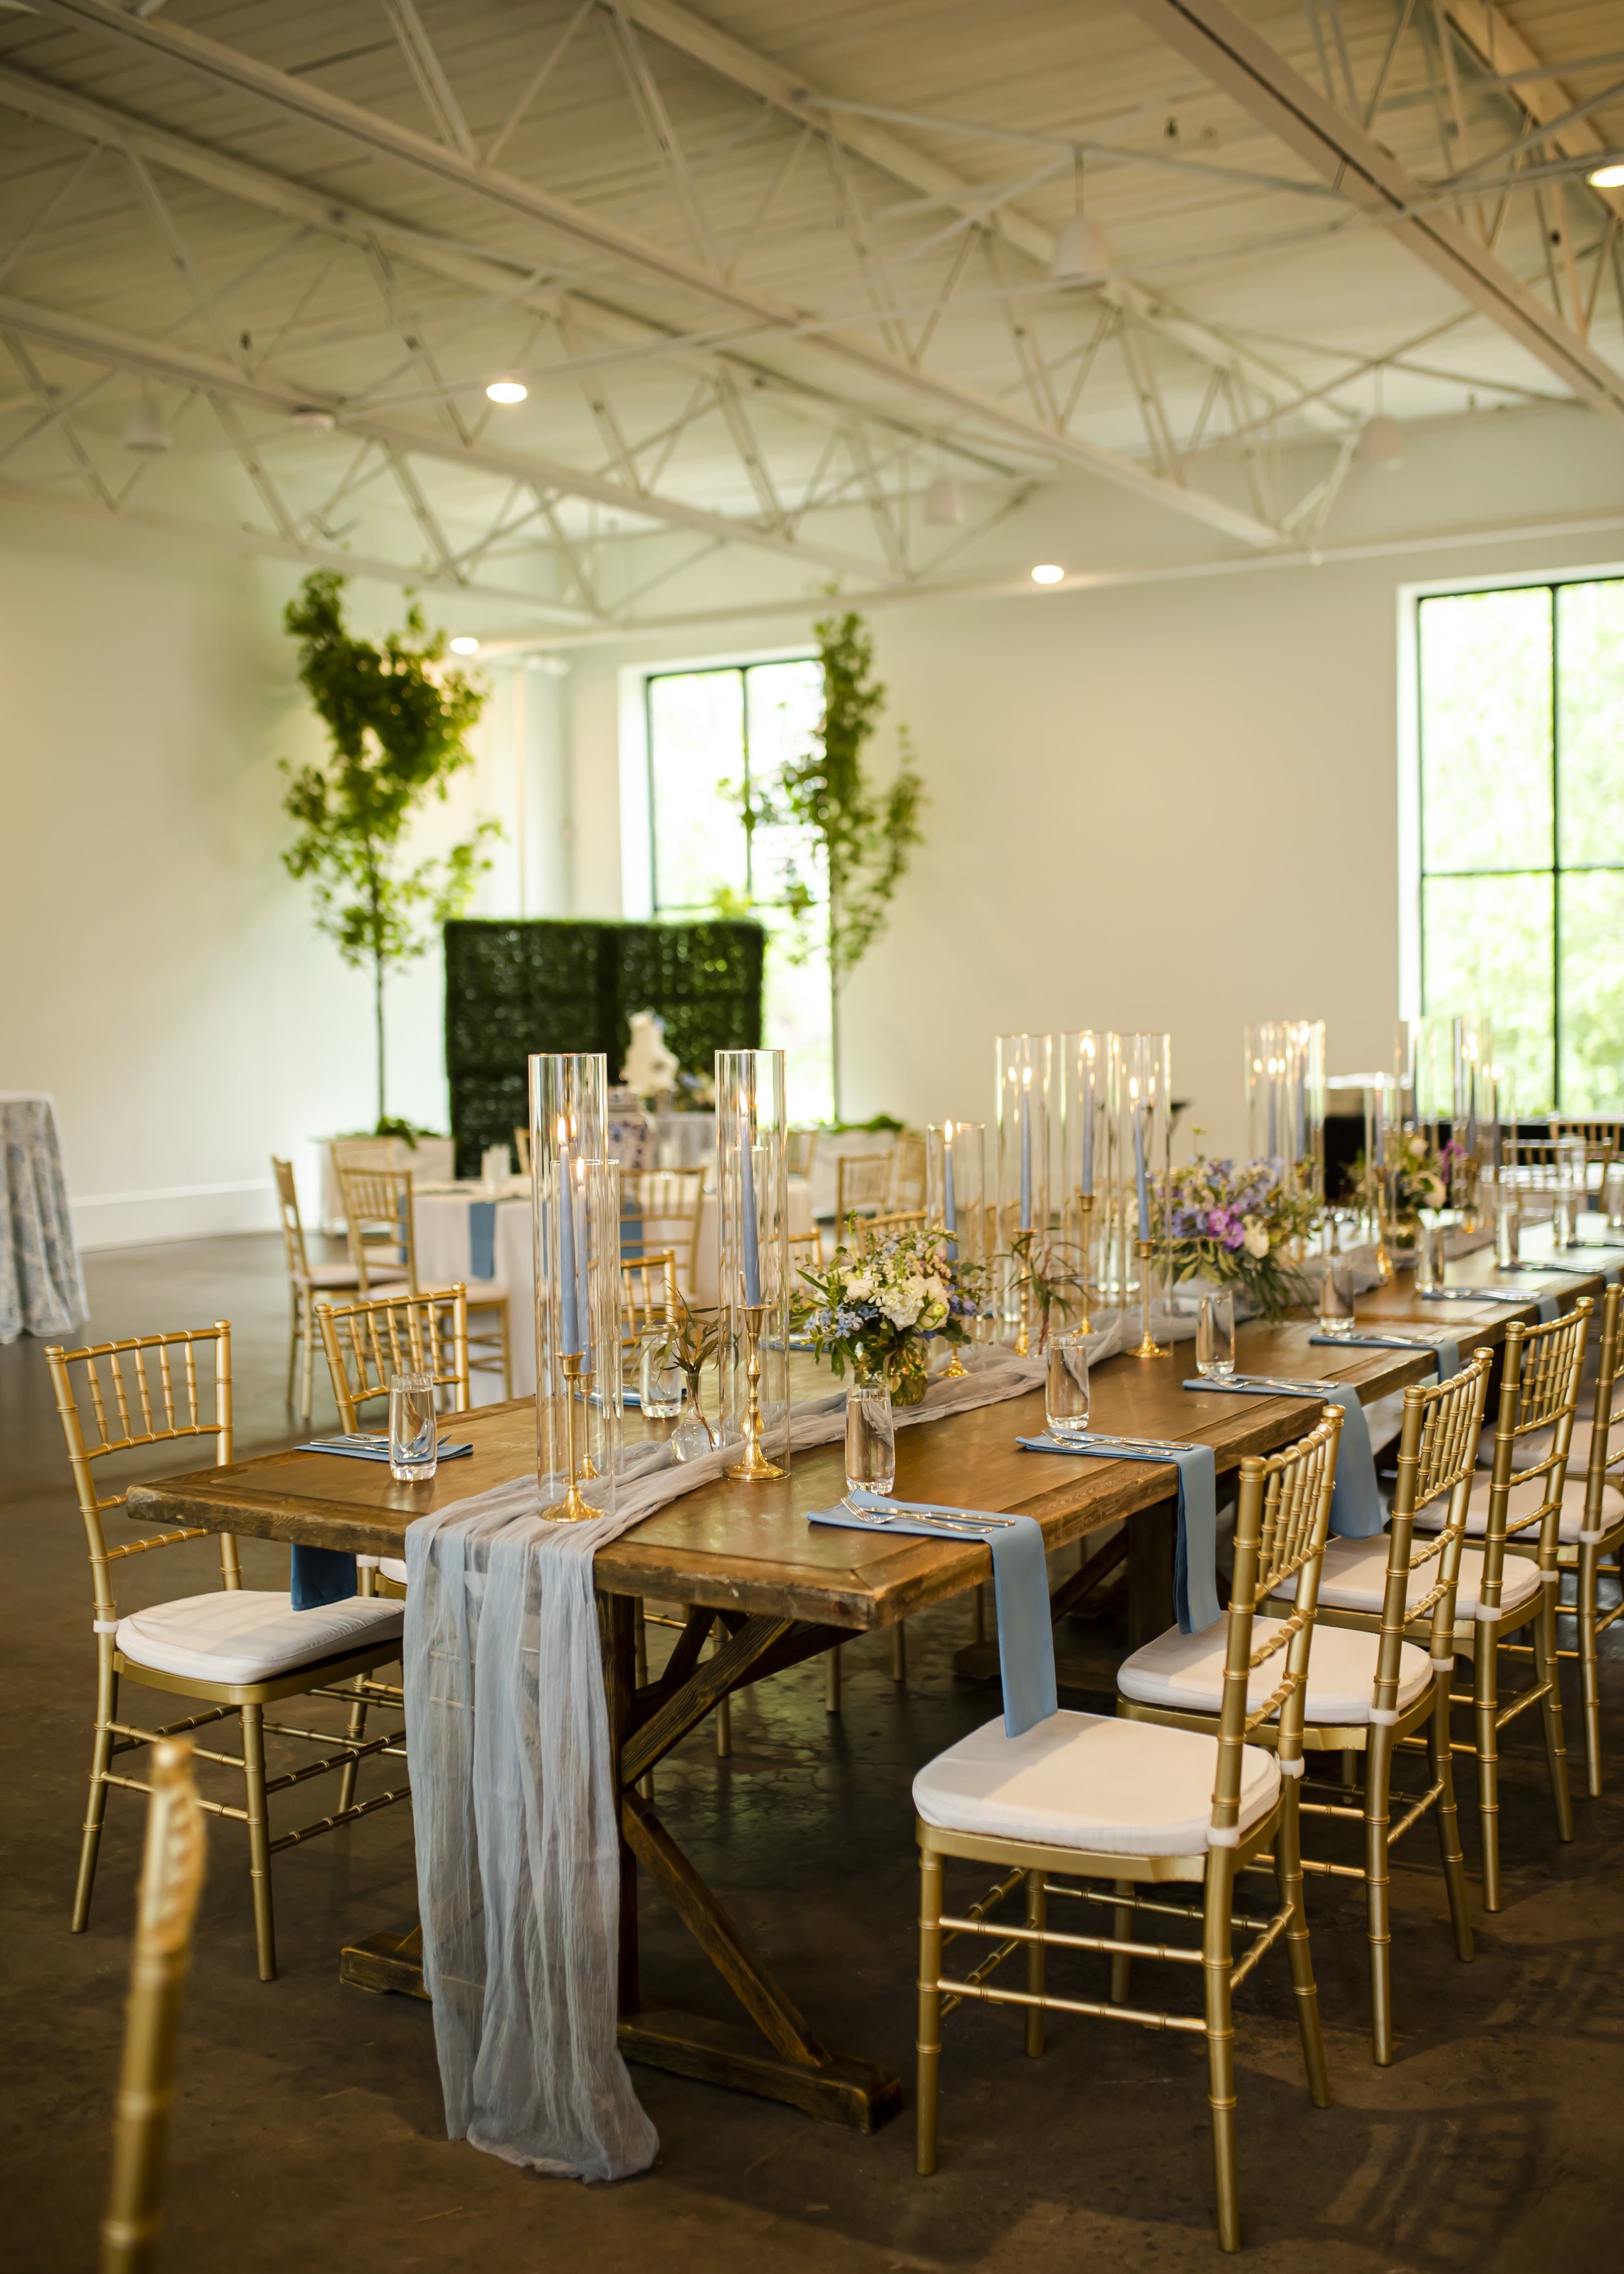
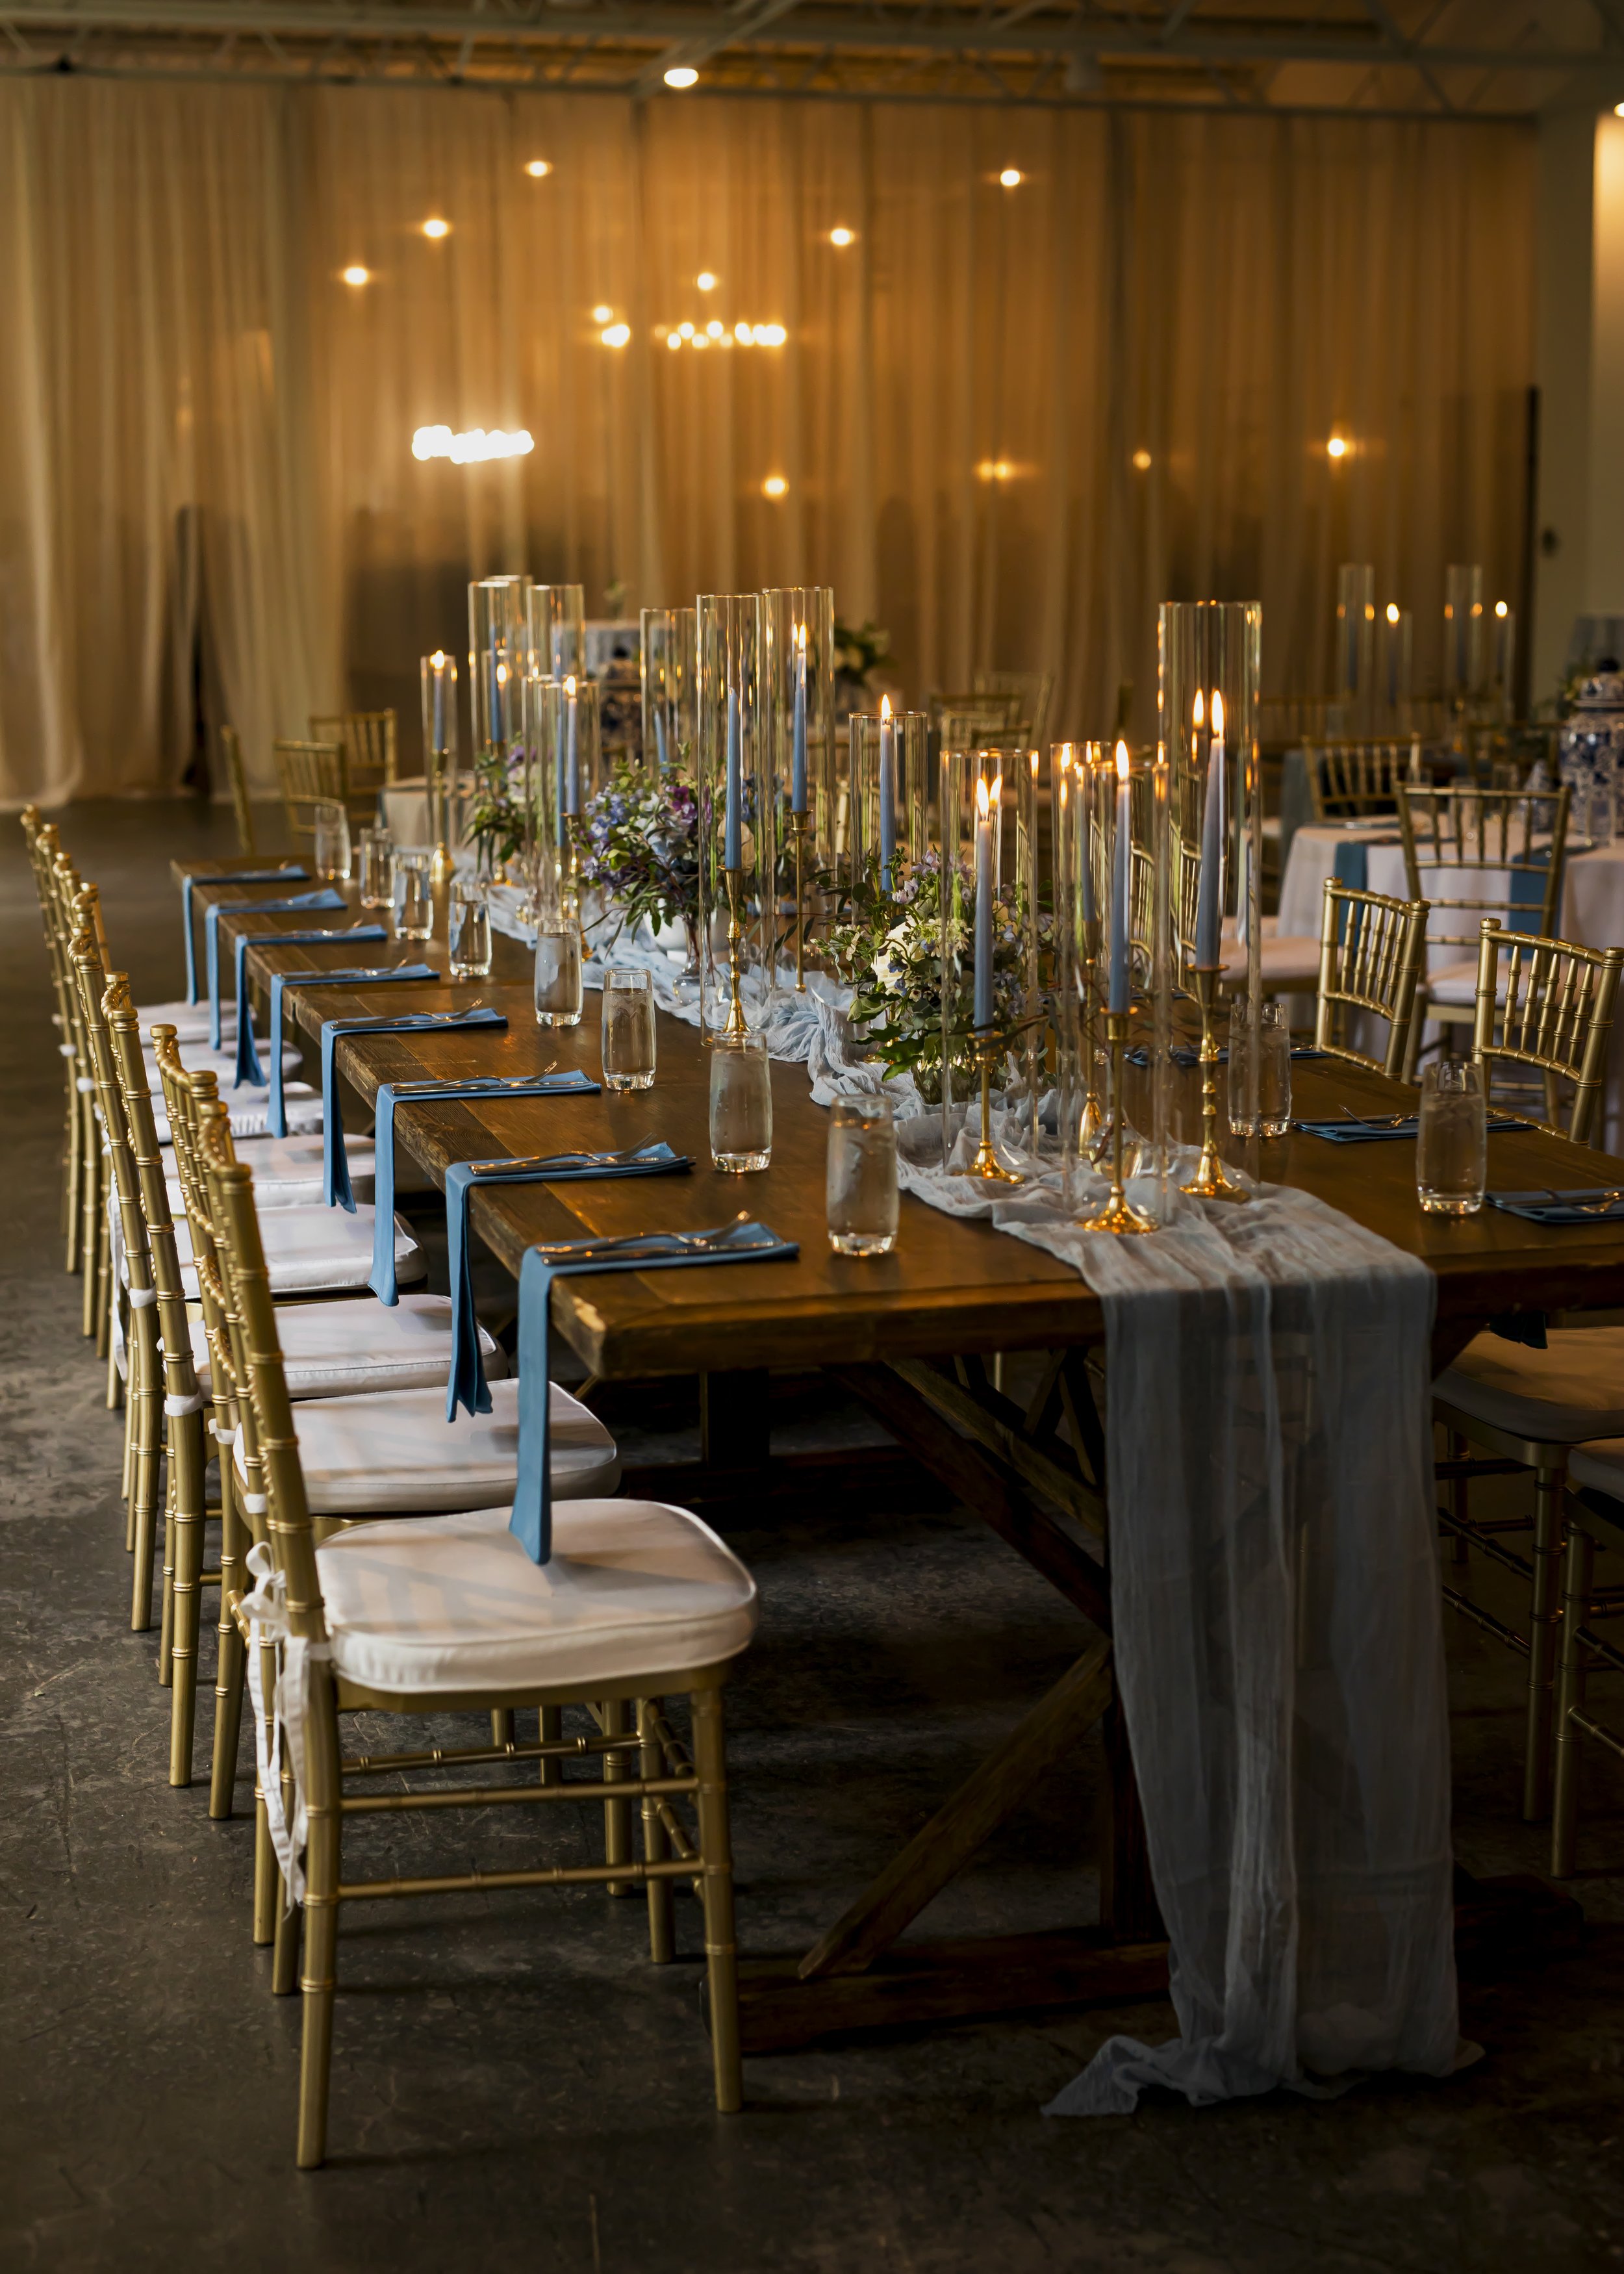
Now here’s where the color really shows up!! Shades of purple and blue were used to create the table centerpieces. Centerpieces were paired with blue taper candles, gold accents, and a dusty blue cheesecloth runner. 

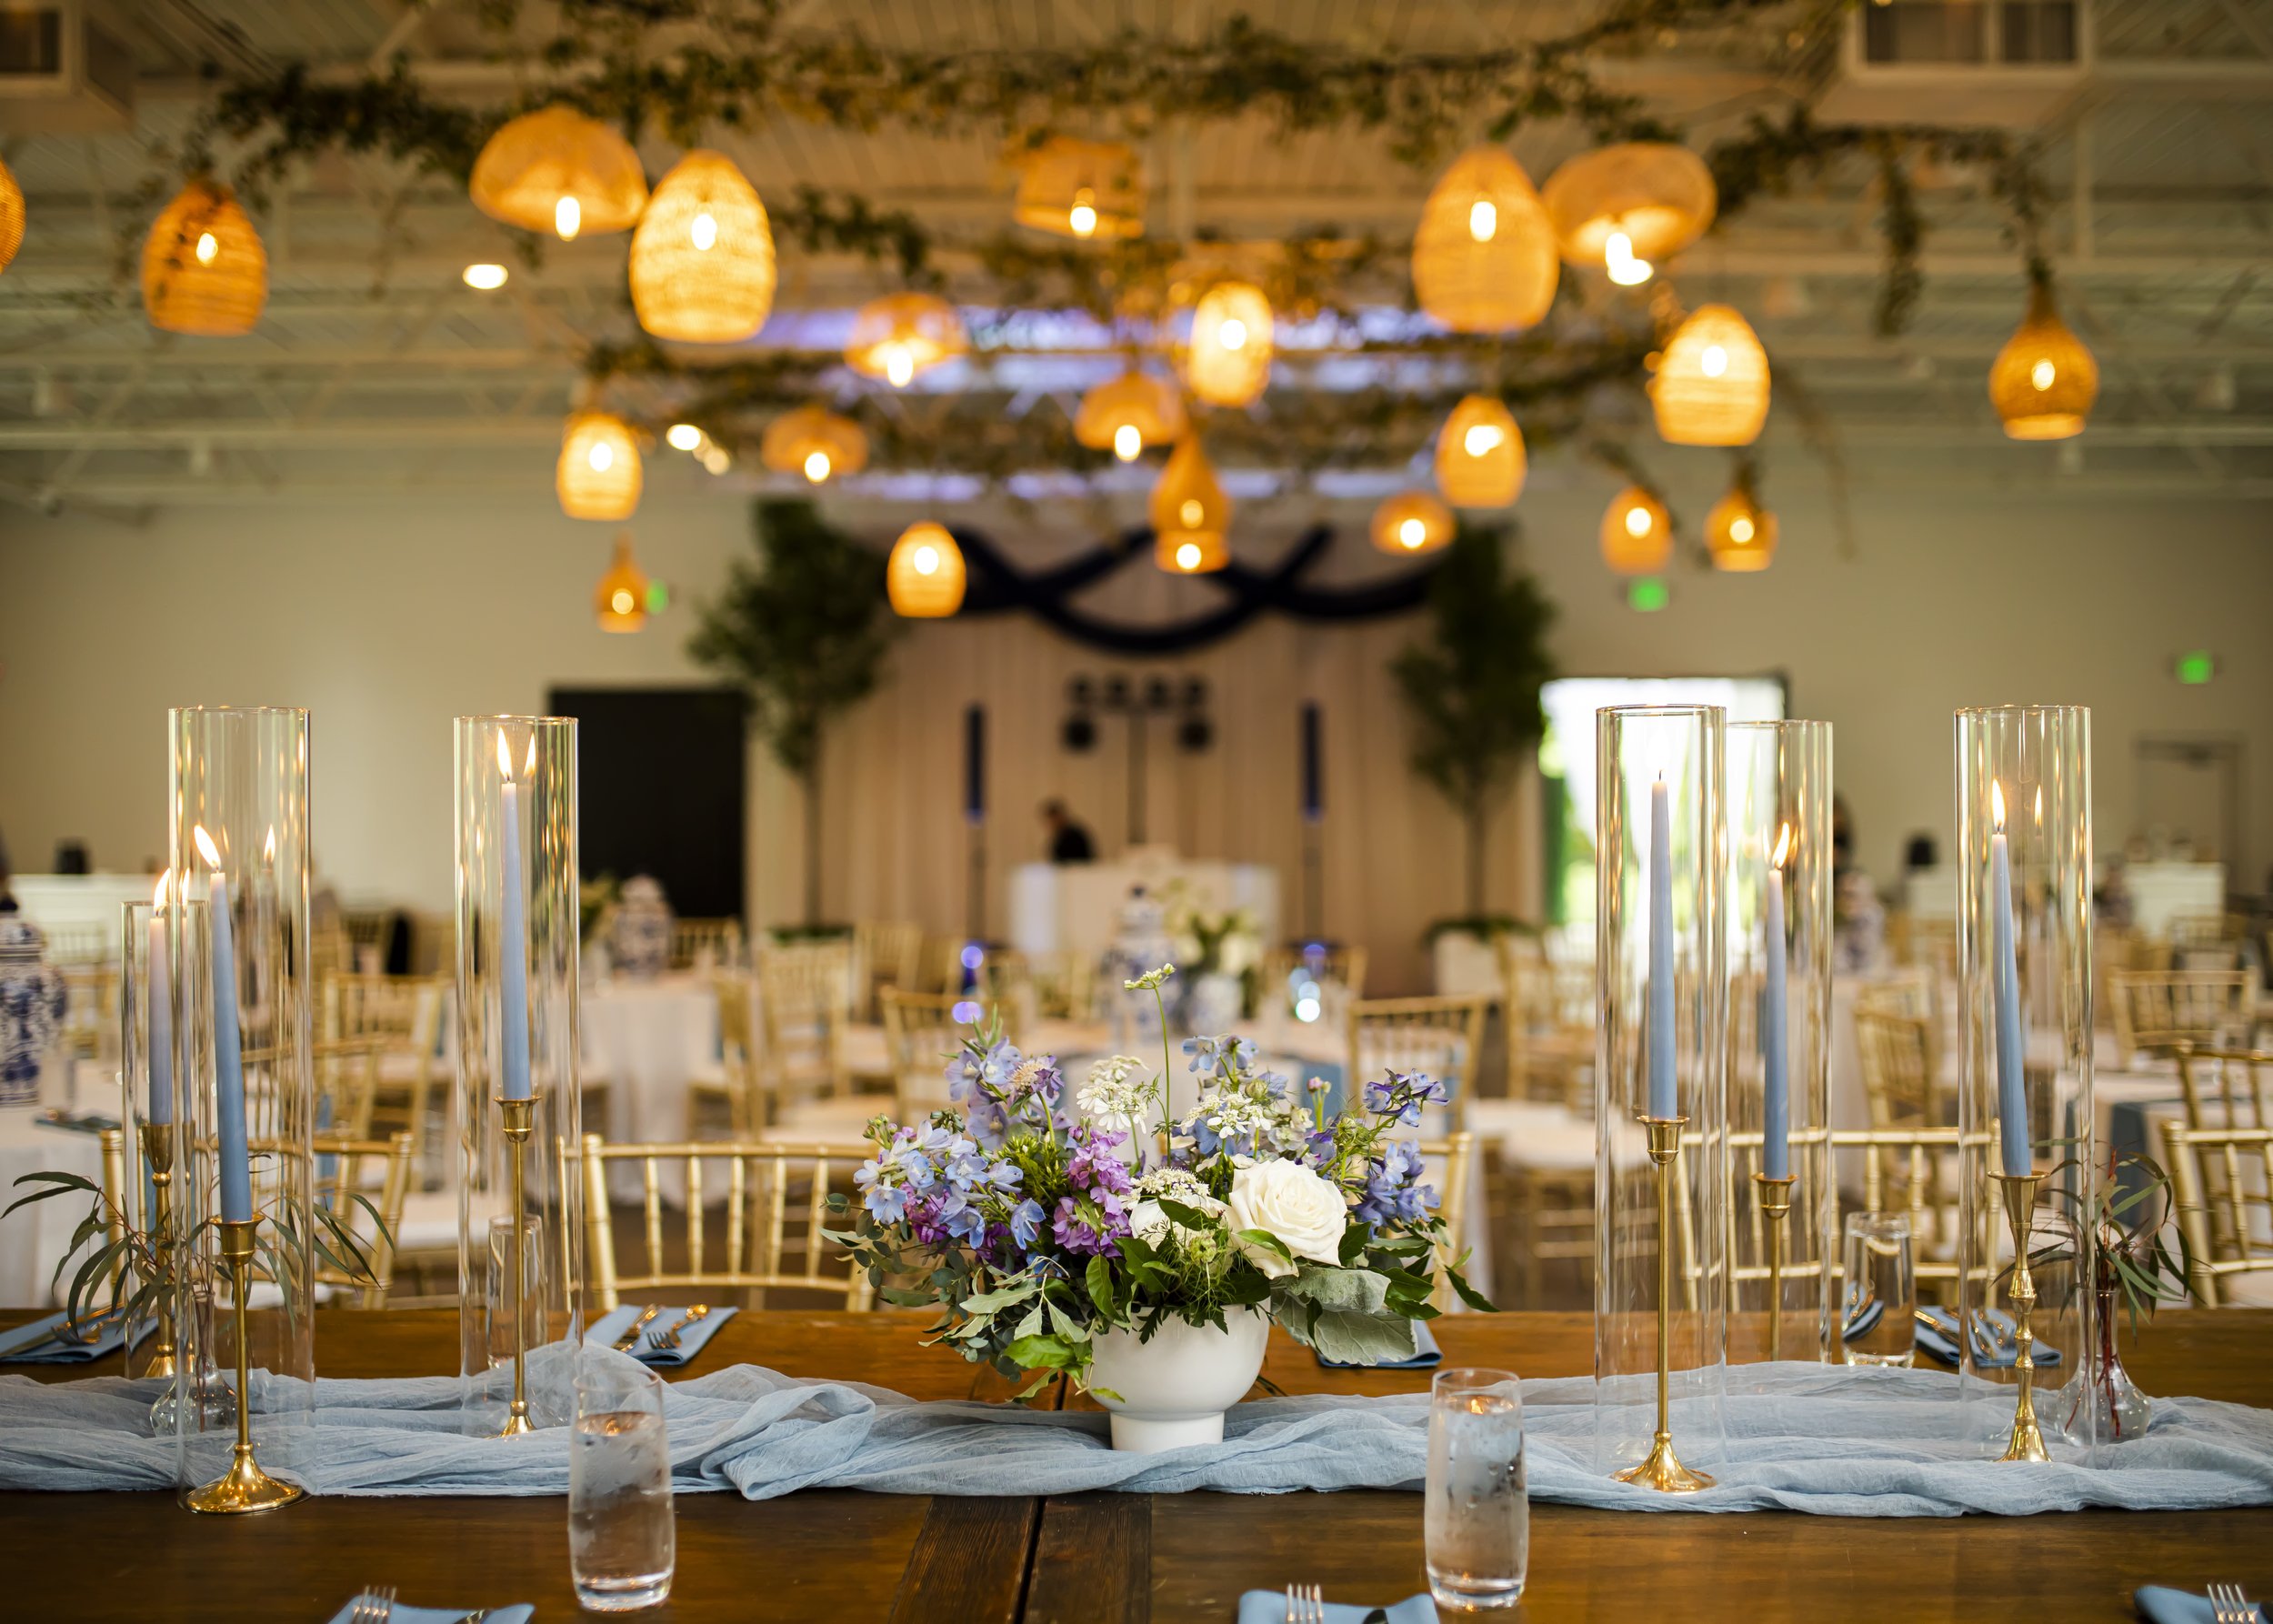
The final touch! The bride sourced a collection of natural lanterns to cover the ceiling over the reception space. We climbed high on ladders to add loose greens to the mechanics between lanterns. This detail, while it was certainly a time and energy investment, was so worth it! 

With this addition, there were florals from floor to ceiling, leaving no room for anyone to check out of the magic of Stephen and Ashton’s wedding day!

Florals: Earth Blooms Flower Farm

Photography: Amaris Photo https://www.amarisphoto.com/

Venue: Westfield Greenville https://westfieldgreenville.com/

No longer available for events

Rentals: Burbank Events https://www.berbank.com/

February: This month on the farm...

Here in upstate SC, February is really our last month of dormancy. Lots of plants are in the ground, but no one is growing much just yet. They aren’t fooled ~usually~  by the false spring, warm days…which we’ve had a lot of lately. 

Since our last farm update, the poppies have really taken off! Their green leaves are looking healthy and happy. At this rate, it’s going to be a beautiful year for poppies! 

We’ve also gotten our lisianthus in the ground. This year we’re growing 3 varieties, one white and two shades of pink!

Tulips hit the dirt, too! We planted 4 or 5 varieties ranging from sunny yellow to pinky-pink. 
Last season we planted a variety of tulip that didn’t do much. We think unpredictable temps caused their poor performance. Much to my surprise, they started popping up this month where we grew zinnias all last summer. We peeled back the weed suppression and layered them with leaves. Maybe they’ll be a bonus flower this season…Who knows?!

Bed preparation has been a focus of this month as well. Luckily we’ve got a trusted source of leaves which are so nice for bulking up and loosening our native and very dense red clay! Slowly but surely, we are working towards a no till operation at the farm–bulking with organic material, cover cropping, and strategically cultivating florals. 

Finally, we’ve done some pruning. Alllllll of the woody perennials have gotten a visit. The limelight hydrangeas, some of which were monstrous, have been reigned in. We also had some trees, like sweet gums and pines, removed that we’re starting to pop up amongst the perennial beds. Now we’ve got some loose and vacant soil.

P.S: We’re now taking suggestions for what we might add in their place :)

As February turns to March, the warmer temps will be come more frequent. Our most exciting Spring flowers like poppies, ranunculus, and anemones will appear and we’ll start moving them to you!!

We truly can’t wait to share!

This Year's Dye Garden: What We're Planting

New to the farm this year are dye plants. We experimented a bit last season with things we already had access to on the farm: marigolds, cosmos, and black scabiosa (and whatever we foraged like acorns, mushrooms, and goldenrod). This season we wanted to expand our color horizons and grow things that are new to us and give colors that we’ve not experimented with before. Shown below are all the seeds we’ve ordered to grow this season for our dye garden and why we think they’ll be great!


Sulphur Cosmos cosmos sulphureus

Sulphur Cosmos create a bright orange dye. These flowers can also be pressed and preserved for eco-printing during the winter season or used fresh when they’re harvested. They’ll make a great cut flower like most other varieties of cosmos and are not picky about soil condition. Funny story…last season I carefully direct sowed rows of cosmos in our field. A miscommunication caused those seeds to be tilled right over, so we accepted that it just might not be a cosmo year. A week or two later, those seeds came right up and were the most beautiful patch of cosmos! Who doesn’t love a flower than can handle anything!?

Plains Coreopsis coreopsis tinctoria

As its botanical name “tinctoria” suggests, coreopsis is another flower prized for giving color. The flower can create a burnt orange print when used with an iron modifier or the same color when used to create a larger dye bath. A print can come from both the bloom and the leaf/stem. It’s another plant that can be dried or pressed for use year round. These flowers practically grow themselves and are prolific bloomers, too!

plains coreopsis flower growing

Black Scabiosa scabiosa atropurpurea

We dyed quite a bit with the flowers last season and can’t quit them! They are sensitive to pH and can create a wide range of color from teals to pinks and purples-a blessing and a curse! This is great for someone experimenting with pH modification of a dye, perhaps in the case of creating botanical watercolors, but less ideal for dyeing clothing because any modification to the color would be reverted back to its pH neutral (navyish blue) state over time. We still love using scabiosa for bundle dying along with marigold to create a color-wheel-honoring orange and blue scheme :)

Japanese Indigo persicaria tinctoria

Truly the newest plant for us to try…the growth habit, harvest, and method of color extraction is all different for indigo when compared to the plants mentioned above. With growing indigo, we are seeking a color and lightfast, stable blue. We are excited to see how this plant does on our farm. Evidently this variety of indigo loves heat and humidity…both of which we can no doubt offer here in Upstate SC!

 Marigold tagetes erecta

Pulling double duty in the field as a cut flower and as a dye plant, marigold has worked her way into our hearts for all kinds of reasons. The bright orange is a perfect addition to our market flowers, catching eyes from tents away. However, it’s usefulness as a cut flower can be sometimes short-lived. With our rainy and humid summer climate, the flower heads develop browns spots quickly from sitting moisture, leaving them to shrivel in the field after the first couple of harvests. Incorporating botanical dye work into our farm gives marigold a second life! These ‘less than market quality’ blooms are harvested and dried for use over the season in a dye pot. 

Marigold Color on Linen

Reclaimed and up-cycled linen tank dyed with farm grown marigold…hanging in the shop amongst all the florals and greens in the peak of the summer season.

Tangerine Gem Marigolds tagetes tenuifolia

These little flowers don’t do much as a cut flower and are so little, they aren’t great for a dye pot either…so why would we grow them?

They make such a cute print when pressed and steamed! Andddd they’re basically foolproof. Last season these were planted amongst our taller marigolds and essentially disappeared. But each time we pulled back the giant marigolds, we revealed the short and round plants covered in blooms! 

We’ve got other plants on our wishlist. I’d love to grow weld and especially madder root! These seeds are proving to be difficult to get my hands on. We’ll use other color to create this year as well, like onion skins, avocado pits, nettle leaf, and other things we responsibly forage from the woods.

Stay tuned to follow our first season producing dye plants to see what works out! 

Marigold Botanical Dye Process

Eco-Printing Dresses: Preserving last seasons florals

As flower farmers, we are constantly dreaming up ways to keep the flowers flowing year round. When the weather cools way off, the field is empty! We really have to get creative. Exploring the world of botanical dye has been a wonderful way to use our mid-winter time. 

It also significantly decreases the waste from our farm. Marigolds that aren’t choice for market still work their magic in the dye pot! Cosmos that bloom between events can be harvest and pressed for winter eco-printing, whereas before they may be destined for the compost. The goldenrod, that really grows like a weed around here, gets cut from between the crocosmia and makes a sunshine yellow on cotton and linen. 

We recently released our ~Spring Dreams~ collection.

A name that means exactly what is says! Creating these dresses, working with what we saved from our warm seasons, has us dreaming big time of what is to come in spring (especially in the way of dye plants, many of which are new to our farm). 

Here is a sneak peak of our process!

First, the dresses are thoroughly cleaned through a process called scouring. Then, dresses are mordanted. Mordanting opens the fiber and give the color something to hold onto. It’s what makes the color last after washing and wearing. 

After the fiber is prepared, the creative part can begin! This is where we add color. Flowers are placed on the damp fiber, it is bundled, and then steamed to release the color from the plant material. 


The best part is the reveal! When the fiber is finished steaming, we unroll it to see how the prints have transferred to the fiber. The fun thing about natural dye is that you never know exactly what you’ll get. Color can be dependent on weather conditions during the plants growth, but no matter what comes out, its always beautiful. I heard another natural dyer say that plant color hits the eyes differently, and I think it is so true! A simple brown from a mushroom is totally different than a basic brown from synthetic dye…but I digress!

Click the link above to see more detailed photos of the dresses in the collection.

Soy Milk Painting: Beginner Friendly Natural Dye Method

Since finding success with soy milk painting, it’s become our favorite natural dye method! Painting with soy milk lets you get creative with design in a way that other natural dye methods generally just don’t allow.

Everything used in this method is totally kitchen and food safe (read…you don’t have to come up with a second set of pots, bowls, and spoons!) It doesn’t require any mordant, the proteins in the soy milk act as a binder between the fiber and dye particles. You could even use cow milk or experiment with others types of nut milk, but soy milk is tried and true! Note that with the method presented in this post, the dye will fade over time…and by over time I mean *months or a couple of years*. There will be plenty of time to enjoy what you created! Read on for a tutorial on creating your very own botanically painted pieces at home!

Here are some things we created in our studio on the farm using this method!

On our shop page you can find kits that include all the ingredients mentioned in this post. Consider it an easy way to get going on this project by yourself or around a table with friends. It also includes more specific instructions and access to a detailed e-book.


To DIY at home you will need…

  • Soy beans

  • Gum (Xanthan or Guar)

  • Paint Brush

  • Cheese cloth/Mesh Strainger

  • Whisk

  • Mixing Bowl

  • Blender

  • Natural Fiber to Dye (Cotton or linen is ideal)

Part 1: Prepare the beans

  1. Soak soy beans overnight.  A little bit goes a long way, try about ½ to 1 cup of beans. Cover with plenty of water, you’d be surprised at how much the beans absorb. I find success with a 1:4, soybeans to water ratio.

Part 2: Make the Milk

  1. Add the soy beans and water to the blender and blend until it’s done all it will do! The smaller the bits, the more protein will be available for dye to bond to. You may need to add more water to the blender and blend once more. You are looking to achieve a pourable “smoothie-like” consistency. 

  2. Pour from the blender into the mesh strainer or cheesecloth that has been laid over a bowl. This will catch the fresh soy milk you’ve just made.

  3. Discard the solid bits that remain in the strainer. 

  4. At this point, you could pause the process until you’re ready to paint. The milk should keep in the fridge for 1-2 days before getting funky

Part 3: Ready to Paint

  1. Measure ¼ tsp of the guar/xanthan gum and sprinkle it over the top of the soy milk and whisk vigorously in an effort to avoid clumps. 

*Xanthan and guar gum can be difficult to find at some grocery stores. Purchase whichever is available to you or order online

2. Assess the thickness of the soy milk paint and add more guar/xanthan gum in increasing ¼ teaspoon increments. 

*The amount of guar/xanthan gum necessary to thicken the soy milk paint will differ based on weather conditions and water absorption of the soybeans. You are looking to achieve a lotion or conditioner like consistency…that won’t run or bleed into other parts of the fiber when you paint. 

3. Starting with dry fiber and paint whatever you like, keeping in mind that the dye will adhere only where the soy milk was painted. You will achieve just one color and shade with this method. We find that the cleanest results are created by simple designs.

4. Once you’re happy with your design, lay the fiber somewhere flat to dry. Some methods suggest giving the soy milk paint up to 2 weeks to “cure”, but I’ve found that I am still pleased with the depth of color achieved with just a day or two of drying/curing. All the fiber shown in this post sat for about 3 days before it was dipped in the dye pot.

5. When the fiber has cured to your liking, create your dye pot and dip it in! When you have achieved your desired depth of shade, rinse well and lay flat to dry.

If creating a dye pot is new for you, stay tuned for future posts on simple methods to extract color. For now, I might suggest keeping it simple. You could use something you find in your kitchen like yellow onion skins (yellow), avocado pits/skins(pinky, apricot), or spent coffee grounds (dark brown)--just simmer until you are pleased with the color of the dye bath, strain, and dip your fiber. 

Once again, if you’d like to give this dye method a whirl without spending too much time searching for everything you’ll need, we’ve created a kit just for you! It contains everything you’d need to create your first botanically dyed piece, including the fiber and dye stuff.