
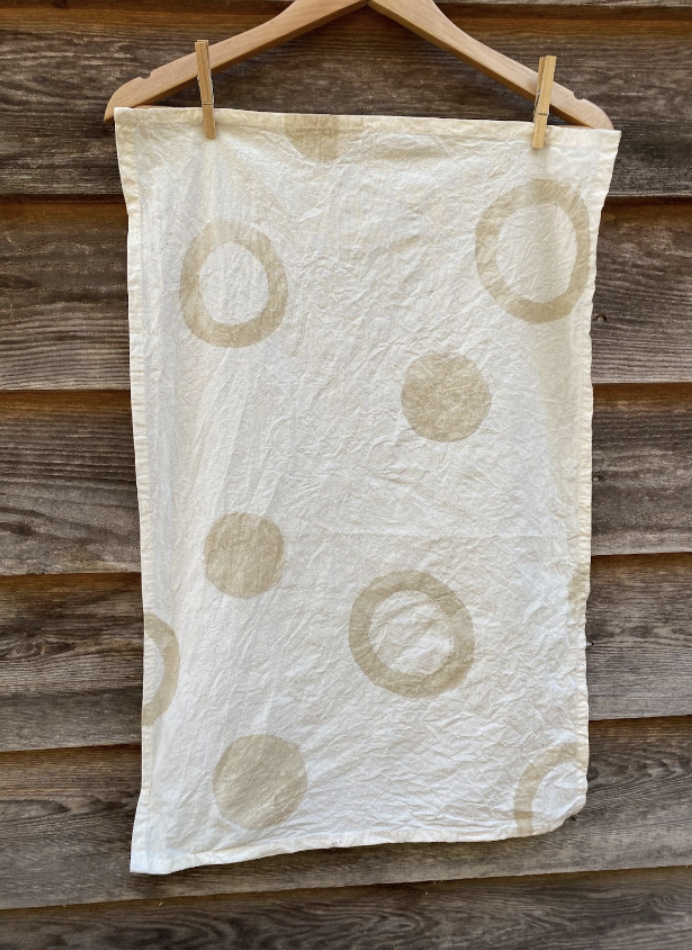
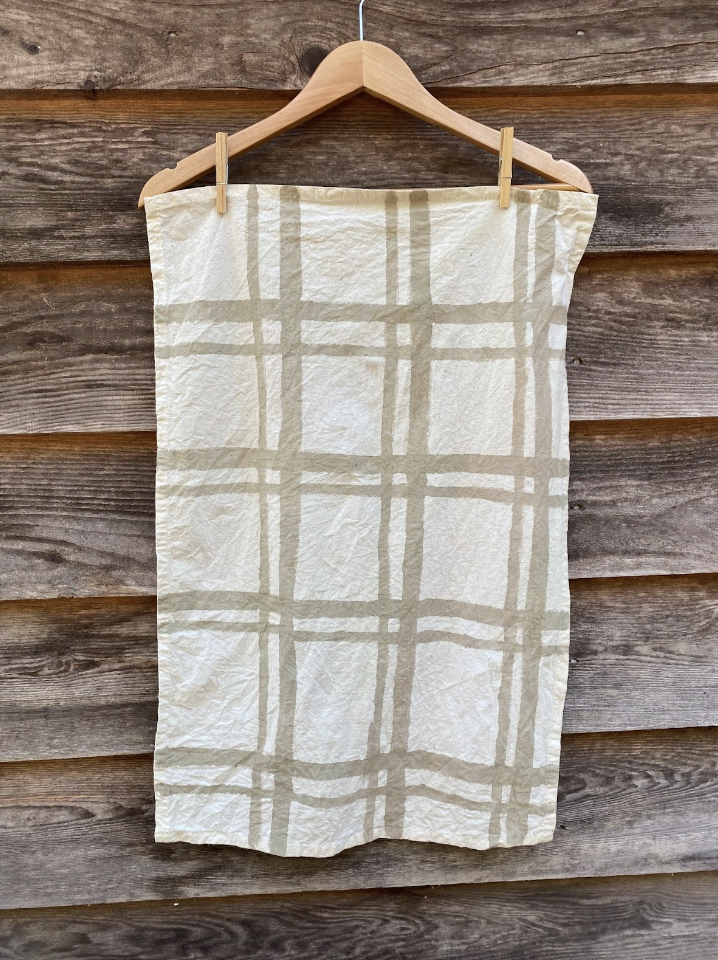
Since finding success with soy milk painting, it’s become our favorite natural dye method! Painting with soy milk lets you get creative with design in a way that other natural dye methods generally just don’t allow.
Everything used in this method is totally kitchen and food safe (read…you don’t have to come up with a second set of pots, bowls, and spoons!) It doesn’t require any mordant, the proteins in the soy milk act as a binder between the fiber and dye particles. You could even use cow milk or experiment with others types of nut milk, but soy milk is tried and true! Note that with the method presented in this post, the dye will fade over time…and by over time I mean *months or a couple of years*. There will be plenty of time to enjoy what you created! Read on for a tutorial on creating your very own botanically painted pieces at home!
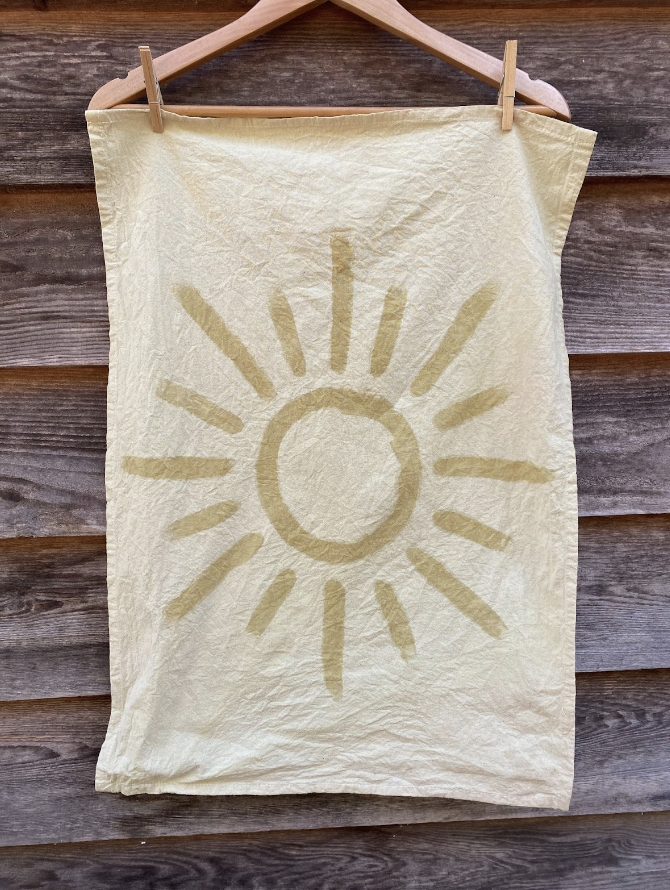
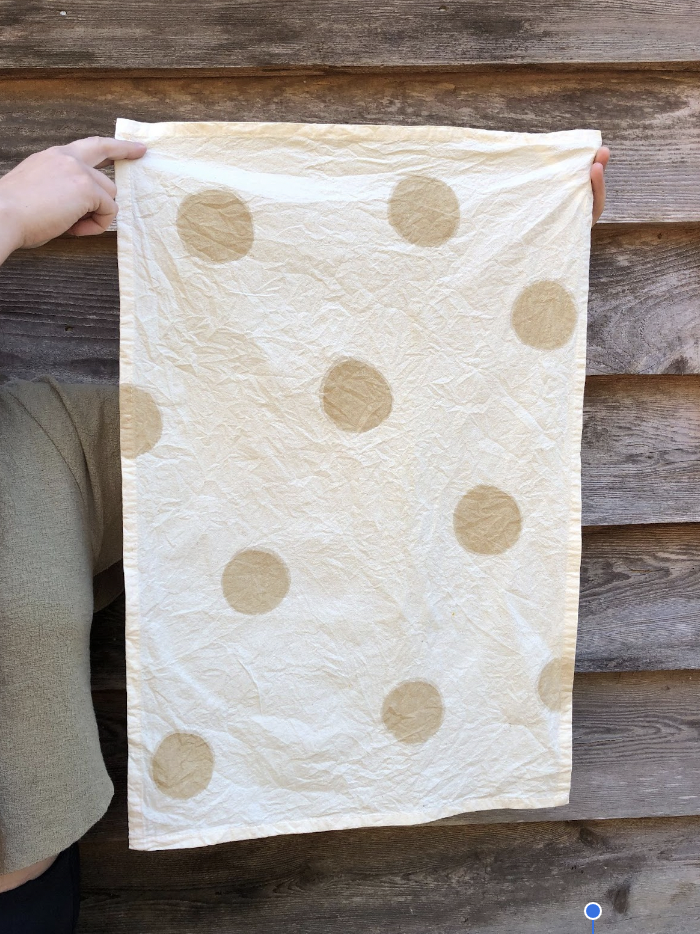
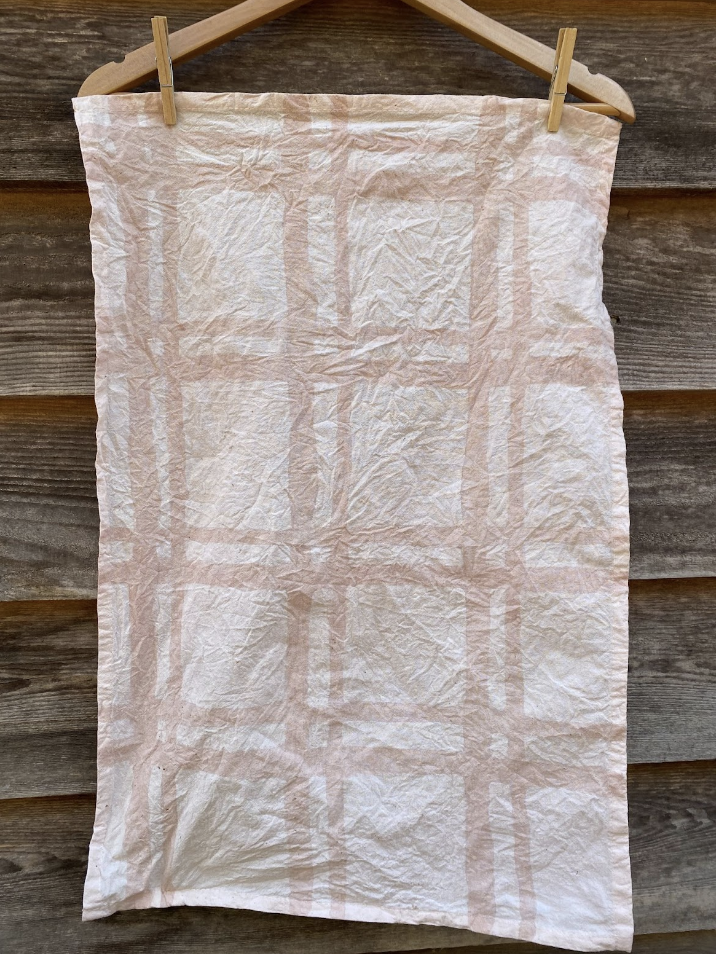
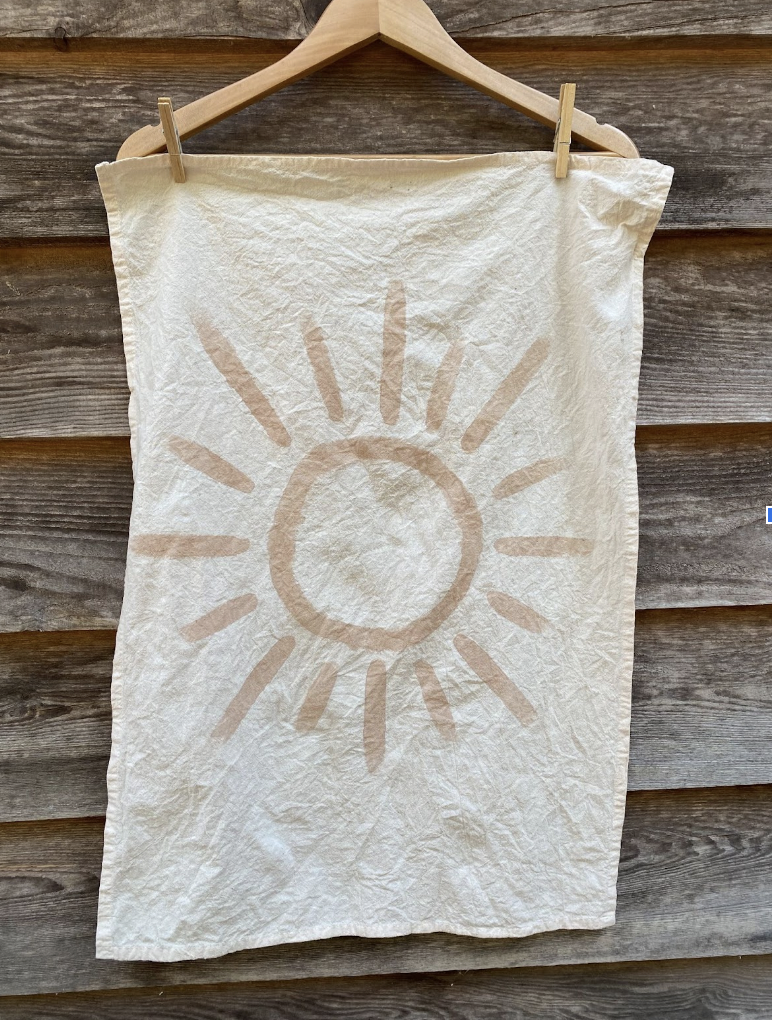
Here are some things we created in our studio on the farm using this method!
On our shop page you can find kits that include all the ingredients mentioned in this post. Consider it an easy way to get going on this project by yourself or around a table with friends. It also includes more specific instructions and access to a detailed e-book.
To DIY at home you will need…
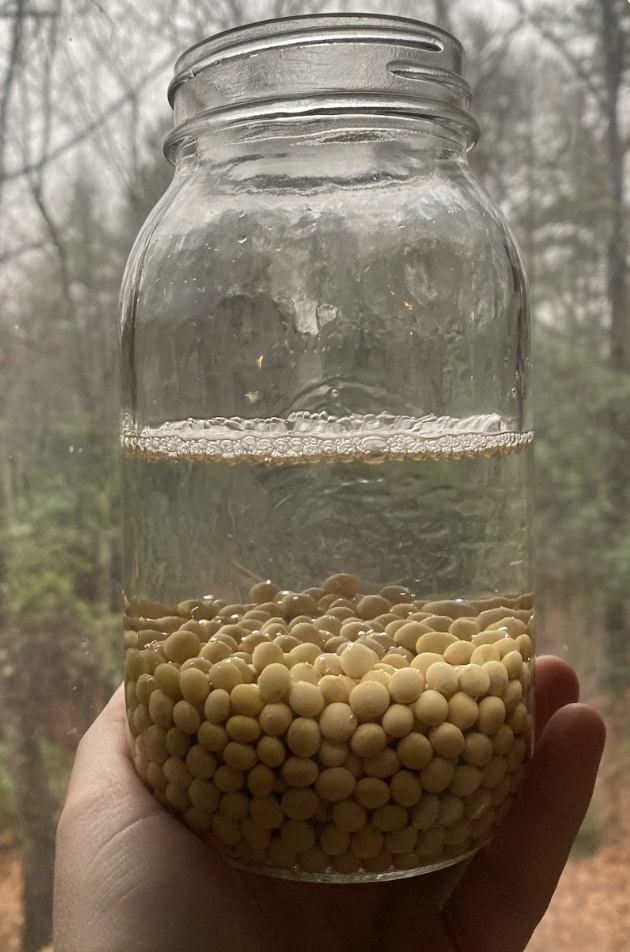
Soy beans
Gum (Xanthan or Guar)
Paint Brush
Cheese cloth/Mesh Strainger
Whisk
Mixing Bowl
Blender
Natural Fiber to Dye (Cotton or linen is ideal)
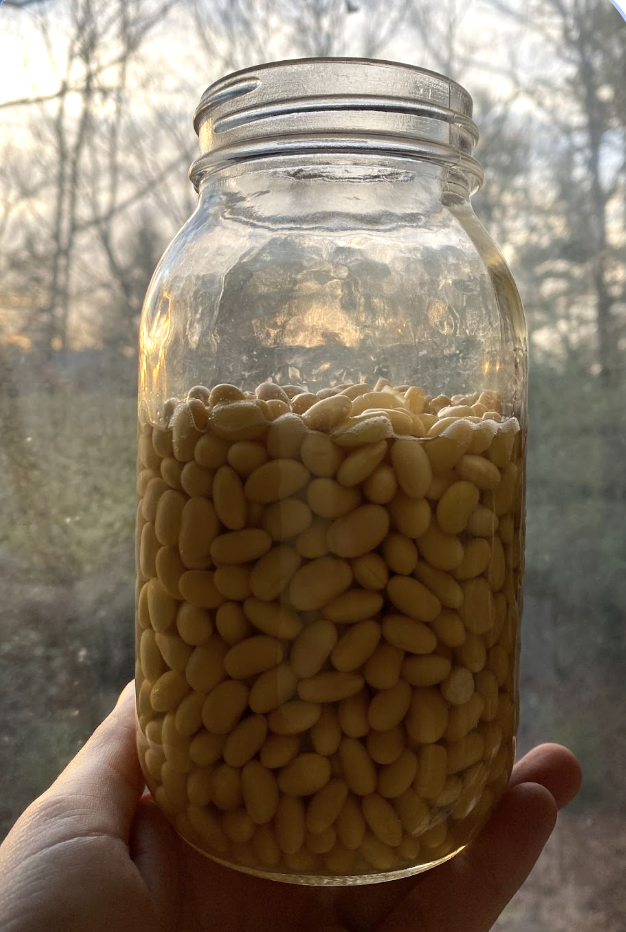
Part 1: Prepare the beans
Soak soy beans overnight. A little bit goes a long way, try about ½ to 1 cup of beans. Cover with plenty of water, you’d be surprised at how much the beans absorb. I find success with a 1:4, soybeans to water ratio.
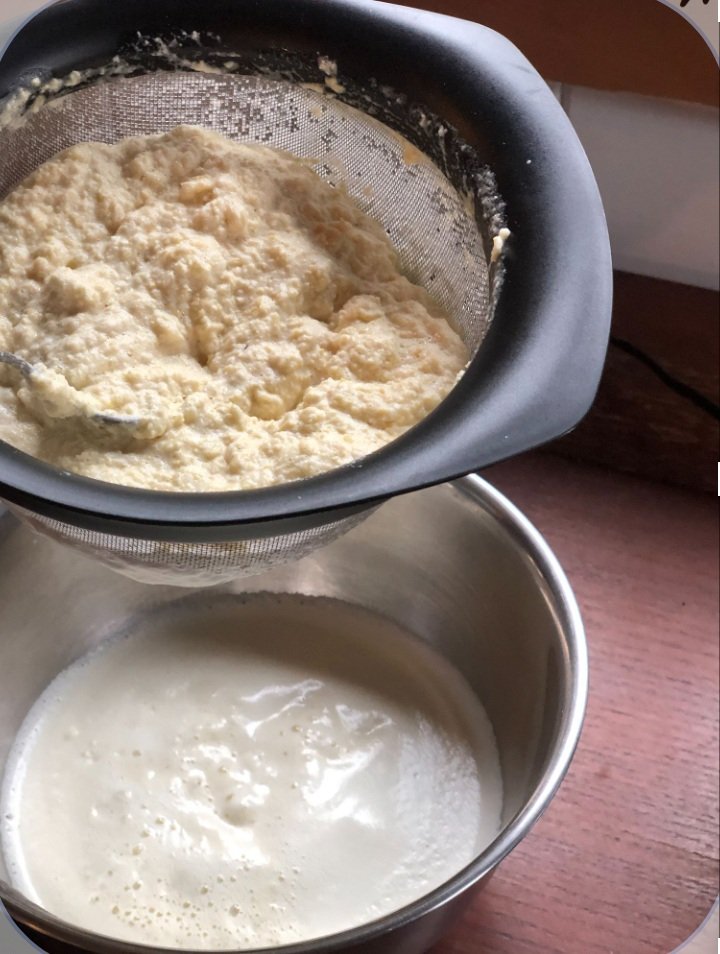
Part 2: Make the Milk
Add the soy beans and water to the blender and blend until it’s done all it will do! The smaller the bits, the more protein will be available for dye to bond to. You may need to add more water to the blender and blend once more. You are looking to achieve a pourable “smoothie-like” consistency.
Pour from the blender into the mesh strainer or cheesecloth that has been laid over a bowl. This will catch the fresh soy milk you’ve just made.
Discard the solid bits that remain in the strainer.
At this point, you could pause the process until you’re ready to paint. The milk should keep in the fridge for 1-2 days before getting funky

Part 3: Ready to Paint
Measure ¼ tsp of the guar/xanthan gum and sprinkle it over the top of the soy milk and whisk vigorously in an effort to avoid clumps.
*Xanthan and guar gum can be difficult to find at some grocery stores. Purchase whichever is available to you or order online
2. Assess the thickness of the soy milk paint and add more guar/xanthan gum in increasing ¼ teaspoon increments.
*The amount of guar/xanthan gum necessary to thicken the soy milk paint will differ based on weather conditions and water absorption of the soybeans. You are looking to achieve a lotion or conditioner like consistency…that won’t run or bleed into other parts of the fiber when you paint.
3. Starting with dry fiber and paint whatever you like, keeping in mind that the dye will adhere only where the soy milk was painted. You will achieve just one color and shade with this method. We find that the cleanest results are created by simple designs.
4. Once you’re happy with your design, lay the fiber somewhere flat to dry. Some methods suggest giving the soy milk paint up to 2 weeks to “cure”, but I’ve found that I am still pleased with the depth of color achieved with just a day or two of drying/curing. All the fiber shown in this post sat for about 3 days before it was dipped in the dye pot.
5. When the fiber has cured to your liking, create your dye pot and dip it in! When you have achieved your desired depth of shade, rinse well and lay flat to dry.
If creating a dye pot is new for you, stay tuned for future posts on simple methods to extract color. For now, I might suggest keeping it simple. You could use something you find in your kitchen like yellow onion skins (yellow), avocado pits/skins(pinky, apricot), or spent coffee grounds (dark brown)--just simmer until you are pleased with the color of the dye bath, strain, and dip your fiber.
Once again, if you’d like to give this dye method a whirl without spending too much time searching for everything you’ll need, we’ve created a kit just for you! It contains everything you’d need to create your first botanically dyed piece, including the fiber and dye stuff.
